
Do you ever see these gorgeous, boutique-style wool mittens that people are walking around wearing in the cold winter months and wonder where they get them? Want to make some for yourself?!
Well, last year, when I was seriously considering selling some up-cycled cloth diapers I had made, I came across a consignment shop where someone was making them by hand and selling them. They were absolutely beautiful, and I wanted to buy a pair so badly; but they came with an out-of-my-range price tag. $45 a pair!
Now, don’t get me wrong. I make things and know how much goes into making something even as small as a pair of mittens, but $45? $22.50 – per hand? Oh, my stars!!! Matt would kill me!
It’s not that it’s necessarily a super-long sewing job, but it can be tedious, and there are other things involved besides just sewing.
I know when I’m making a gift for someone, I think I spend more time sourcing and shopping for the best print or fabric than I do on the sewing! As an example, I made a car seat poncho for a friend. It was my first one using a hidden layer of tulle, and also my first time doing a circle-shape poncho. I kept fiddling with the shape to get it just right, and was still perfecting my technique for getting just the right look with the tulle. The actual poncho took me about two and a half to three hours to create. I was in the fabric store for almost two hours deciding on perfect print. And then I add in the drive to and from the fabric store, the massive headache of two cranky kids asking “Can we PLEASE leave, Mom?” every twenty-two seconds, and so on and so on. You see where that’s going.
So that’s why it’s so much easier to gift homemade than to sell it. It’s also why it’s easier to make for yourself than buy homemade, if you have the ability. And, honestly, if you have a sewing machine, the desire, and access to some old fleece or wool sweaters that aren’t being used, you’re in the right place! I believe in you; and you should, too!
So let’s talk about what we need to make these earth-friendly, functional, cute little hand-mitts!
Obviously, if you are going wool, an old wool sweater for your outer lining. (If not using wool, you can do fleece on fleece with these, and they will turn out fine.)
some up-cycled (or new) fleece for the inner lining
sewing pins or Wonder Clips (I love these!)
scissors
marker
end of a spoon (or turning tool of choice)
a threaded, ready to rock-and-sew sewing machine
And if you’re going to sew old-school, you’re going to create your own pattern! I want to say here that I have created patterns for everything I have ever sewn on my own. Some things are more forgiving/easier than others. I am a YouTube-taught sewist and am by no means trained in pattern-making. I do it as a hobby and sometimes out of necessity.
That being said, these mittens were difficult for me to make a pattern that I was pleased with. But I am picky. I had a useable pattern right out of the gate on my first try (which is the pattern photographed in this tutorial), but when I had my finished product, there were revisions that I wanted to make. I would say they were just my personal taste and had nothing to do with the function of the mittens. I just wanted to say this upfront so you don’t get discouraged if you make a pattern that you don’t love the first time. Sometimes the tinkering involved with your own patterns is what begets the ultimate as-close-to-professional-for-your-taste result you crave. Does that make sense to anyone besides me?! I hope so.
Anyway, let’s get on with it.
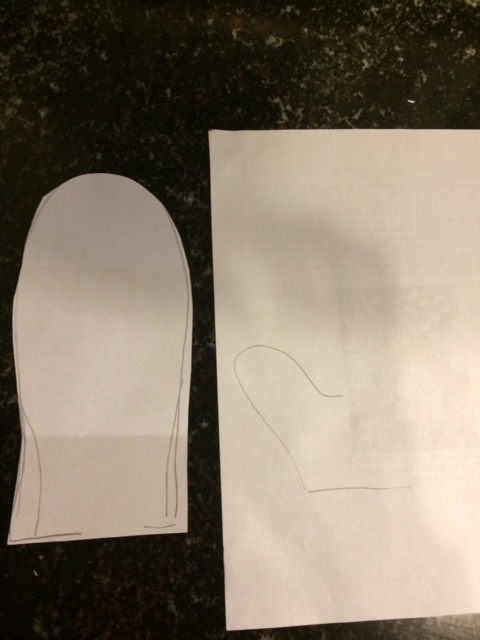
The first thing you want to do is have whoever you are making the mittens for put their hand flat down on a piece of paper with their fingers all touching each other. Like this:
 Trace around their hand in a shape that you like, leaving yourself about 3/4 to one inch of space around the entire hand. (My daughter shifted her hand to the left as I was about to take this photo – you want to make sure you’re going around the hand evenly.) You can come up a few inches on the wrist, if you want; just keep in mind that we are going to add a cuff to fold over this, so you may not need to come up that much.
Next, cut that shape you have traced out and set aside.
And now we need to get the pattern piece for the thumb hole. To get this, simply place hand down on sheet of paper with thumb extended out to side. Like this:
 You’ll want to trace along edge of inner wrist and around the thumb, again, a generous 3/4″ border. You can end your line at about bottom knuckle of index finger.
Now to get sizing as accurate as possible, lay down your thumb piece from above. (You can cut it out around the thumb and inner side of wrist, if you’d like.) On top of that, lay your first cut-out that you traced around closed hand.
Now you can place your hand on top of these two pieces to see at what level on the main mitten piece your thumb piece needs to sit. This (below) is just right for my daughter. Trim your thumb piece (Pattern Piece B in photo below) to the width and height of your main mitten piece.

Looking good. And now we need to make another piece to connect the bottom portion of the inside of our mitten to the top. And this is where it gets a little, tiny bit hairy. Not too bad, but a little.
What I decided was best (and easiest), was to fold my lower thumb piece downwards and kind of trace around the top of the mitten where I needed my top thumb pattern piece to go, and also trace around my downwards pointing thumb. (You also want to be sure to leave about 1/4″ overlap between your top inner and bottom inner piece – picture that you will be sewing them together and lose a little fabric length that way.)
Makes sense, I think. (I hope? LOL)
So now you will need to trace around the top of your main mitten piece as well as around your thumb. And you will eventually cut that out, like this:

So now you have three pattern pieces for your mitten- an outer main piece, an inner lower piece, and an inner top piece. When you assemble the pieces and hold them together, you will have a mitten!
 And, lastly, you’ll want to cut a pattern piece about four inches tall by the width of the bottom of your mitten. (A wool sweater cuff should work fine. If that’s not available, or if it’s not the right size for your mitten, you can cut off the end of the sweater cuff and just take it in a little on one of the sides.) Also, I should point out that you want one end of this sweater cuff piece to be finished as it will be revealed on the outer wrist on your finished mitten.
Hopefully you came up with a pattern that fits well and that you like on Round One. If not, don’t be discouraged. Try again and see how much you can improve on the second draft!
Now that you have your full pattern cut out, and assuming you are happy with it, you’ll need to start cutting out your fabric to go with it. You will be essentially making four complete mittens – two inners and two outers, with two additional cuff pieces to roll over and hide all of the rough parts of your work.
So you will cut one of each of the pattern pieces (for each hand! so a total of two of each piece) from your wool or outer fabric. (This includes your sweater cuff.)
For your inner fabric (I used fleece), you will cut out just your inner upper and lower thumb pieces and your main mitten piece. (Remember, each hand requires a complete inner and outer set of pattern pieces. Also, when you are cutting, make sure to cut so that your thumb pieces will be facing opposite ways. You do not want to realize when you are ready to turn your work that you have one mitten with the wrong side of wool revealed. Don’t ask me how I know! Ha, ha!) *I like to cut my pieces out two at a time with fabric folded right sides together to be sure that I’m getting the two different thumb pieces with the desired piece of fabric that will be revealed, if that makes sense.*
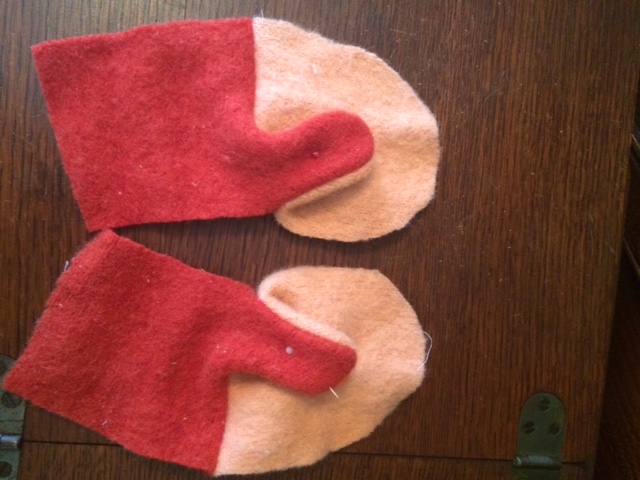
Here you have all of your pieces cut out – a set of fleece mitten inners, a set of wool mitten inners, a set of fleece main mitten pieces, a set of wool main mitten pieces, and two cuffs of your outer wool.
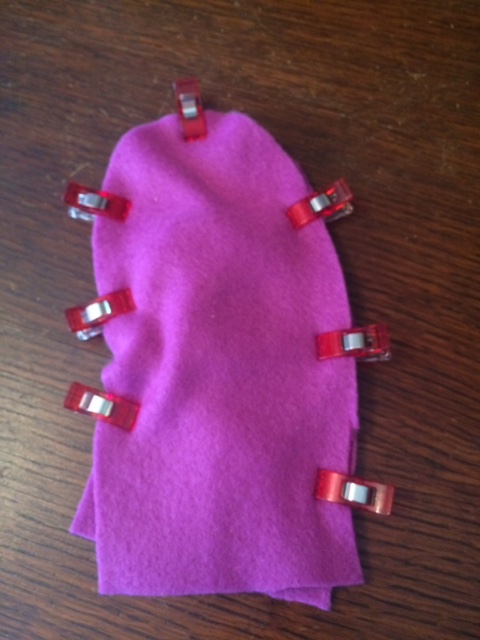
 Now you will take your two inner pieces, the upper and lower thumb pieces, and turn them right sides together, lining up thumbs. Clip or pin.

Now you want to sew from the base of the thumb, up and around the thumb, and across to the far side of your mitten. I like to keep my seam allowance as tight as possible around the thumb and then get a little more lax as I go through the mid-section of the mitten.

Trim your seam allowance here as tight as you can, without producing or encouraging any fraying. Also, triple check that your needle went through both layers around that thumb. We don’t want any air leaks on these frigid winter days!
Now turn that baby right-side out and get a look!

Oh, yes! Looking good!
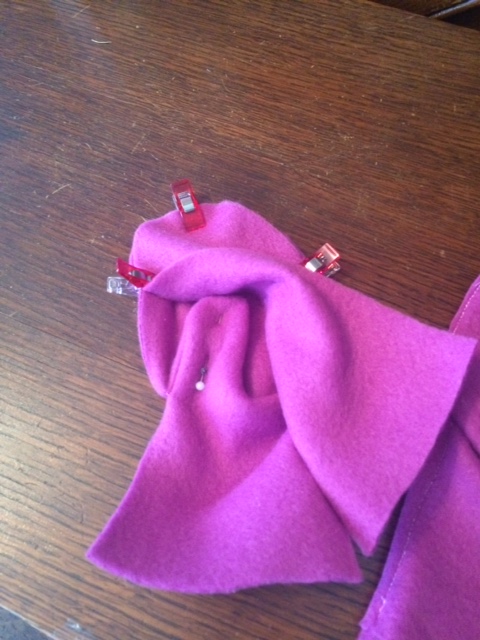
At this point, we need to sew this up to our main mitten piece. But we don’t want that pesky thumb to get in the way. Pin it way into the middle so there’s no risk of it sneaking into your sewing space.
And now it’s time to sew the main piece onto this. You’ll need to lay your main mitten piece right sides together with the pieces pictured above. Pin or clip very precisely, especially around that tricky thumb.
I apologize in advance, but I forgot to take a photo of the wool portion of the mitten when I was doing this. This is the same exact step, it’s just a photo of the fleece inner. And you have to do this to both sets of mittens anyway, so it’s no big deal, really.
You can see in the second photo that the thumb piece is pinned and hiding in there, just like our example above before I changed photos.
Sew around the edge as close as you can, being sure to go through both layers, and being triple sure that you are going through all layers when you get to that thumb area. (I actually sewed around that thumb hole again, just for some extra strength in that area.) And turn right-side out. You’ve got a mitten – well, half of one – the inner lining!
 You are going to follow these same steps for your inner and outer mittens. You will end up with two right-handed mittens, one inner, one outer; and two left-handed mittens, one inner and one outer.
Set aside your outer wool layer for a minute and grab one of your fleece inner mittens. Also grab one of your sweater cuffs.
You want to take your sweater cuff and fleece inner and put them right sides together, with the rough edge of your sweater cuff lined up against the bottom edge of your fleece inner. Pin or clip together, like this:
And sew all the way around, being absolutely sure that your needle is going through both layers of your wool and fleece.

You can trim your seam allowance here, and then turn right-side out.
Tell me this isn’t cute?! You’re doing an awesome job!!!

So this is a completed inner mitten. You will now turn this inner mitten inside out, wearing it on your hand. (Again, if you didn’t trim your seam allowance around the mitten, do it now.)

You want to now place your outer mitten over top of this mitten you are wearing.

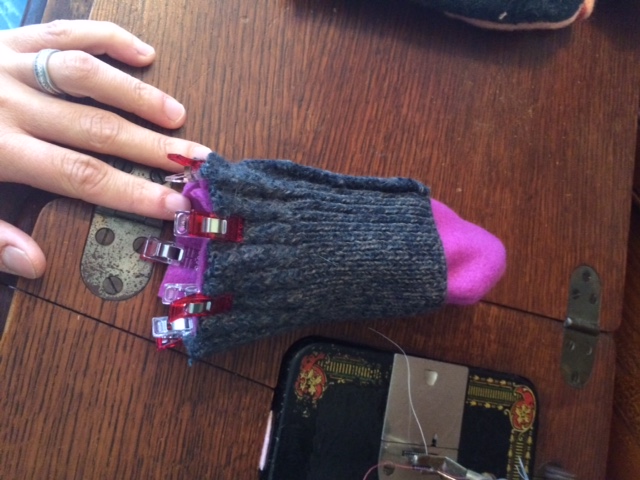
Looking good. Now to hide that rough, unfinished area on the bottom of your outer mitten, we are going to fold up that sweater cuff to hide it! Simply fold that cuff upwards and secure. Repeat for other mitten.
Some ideas to secure your cuff – a hand-sewn button; a hand-sewn felt button; some thick yarn in a fun, contrasting color hand-stitching that cuff closed; a hand-sewn silk flower or ribbon tied in a bow; your business logo or boutique tag. The possibilities are endless!
For this pair, I decided to do mismatched felt flower buttons.
I just rolled up my cuff and sewed the buttons on by hand.
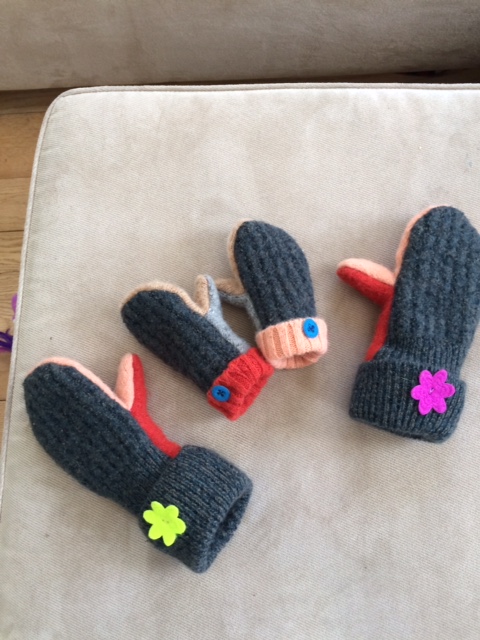
Ta-da! And when I finished these, my son asked for a pair, too!
Let me know how they turned out! You all know that I love pictures of handmade items! Especially up-cycled pretties!
And since I went through all the trouble of making three patterns to create this tutorial ( toddler, youth, and small adult), I thought I might throw the pattern up in the shop as a pattern package. So keep an eye out for that if drafting this had you pulling your hair out and you’d rather just have a pattern to follow!
Stay warm!
C

If you made some insulated, waterproof mitts, I’d so buy some!
Temps dropping to below 0 over the weekend.
Boooooo
LikeLike