For our family, it just made sense for us to transition to using only cloth paper towels. I was already using cloth diapers on the kids and cloth pads (search The Hippie Chick Menstrual Solution in the search box at right for more info on that) for myself. Let’s just say it was a journey, an evolution towards a more eco-friendly lifestyle – one baby step at a time. Luckily, everyone in the house was on-board (with a little resistance from Matt, who doesn’t do the laundry!).
Of course, savings is a topic to be discussed when considering switching to cloth. I’ve searched all over the internet trying to determine how much money is actually saved when you stop buying paper towels. As is often the case with a topic like this, there’s a different answer from every source. I have seen anywhere from $350 a year to $1,000 a year in savings for a family of four. I guess it really does depend on how often you use the towels. I know that A.S. and A.W. like to use a ”nakkin” for every little thing, and if we were using disposable products, we’d be shelling out mucho dinero each week to Bounty!
Again, though, it really comes down to our desire to live a less-wasteful lifestyle. We recycle/reuse as much as possible, and try to model that for the kids.
Even making these paper towels themselves is an act of upcycling, which I just love. But we’ll talk about that more later when we discuss the fabrics used to make these.
Anyway, I made a set of about 12-15 a little over two years ago from an old bed sheet and a couple towels (that’s the up-cycling part that I love about this project). I paid $1.50 at Goodwill for the old bed sheet and had the towels laying around the house. Not a bad investment for two years plus worth of heavy, heavy, use! (Even at the low-end estimate of savings of $350 a year, I think it’s worth it.) They were brilliant and beautiful to look at, at first. But then when they weren’t as new and crisp as they once were, I started getting lazy with them. I used them to strain our homemade nut milk and ghee. Not a good idea! They turned into greasy, nasty rags.
To be honest, the kids and I were okay with that because we knew they really were clean, just really, really well-used. Ha, ha! But then we had a few occasions of having people over who would ask for a paper towel, and we didn’t want their first experience with cloth to be with these:
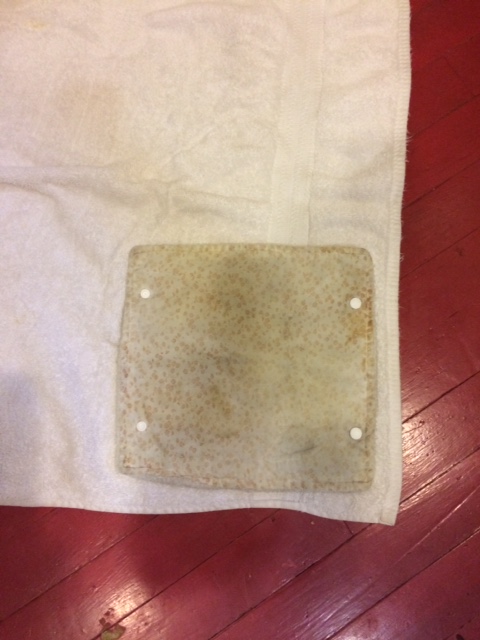 Man, they do look pretty bad! Amazing some of our friends ever returned! It was time to make new ones for sure. And this time, we’ll treat them right!
Since we are currently using all of the bed sheets in the house, we took a trip to Goodwill to gather our “pretty side” material. Prices went up in the last 2-3 years! For a fitted twin sheet, I had to shell out $2.99!? Still a good deal, so I went with it. Also, the print was kind of spring-like and fun, something much-needed to get through winter, a season I’m not entirely fond of.
Now, friends that sew, these are ridiculously quick and easy to make. Really! I hope you’ll make some and try it out.
And friends that don’t sew, keep an eye out. I love hunting for great prints and can’t keep excessive paper towels for myself, so I thought I might consider making a few pretty, decorative sets for the shop.
Alternatively, if you’re a real-life friend that’s interested in trying these, go pick some fabric you like and bring it over – I’ll make them while the kids play! :O)
To start, you’ll need:
a bed sheet or other cotton/flannel “pretty side” fabric
a towel or two or terry cloth fabric
snaps and a pair of snap pliers (optional, if you want to join your towels and store them on an old paper towel roll or stand)
scissors
Wonder Clips or pins
a cocked-and-ready sewing machine
Okay. You’ve gathered your materials and you’re ready to rock and roll on making your towels. First, you need to determine the size you would like them to be. If you have paper towels in the house already and like the size of them, just trace one, adding about a half-inch seam allowance around your perimeter. Pattern? Done! Easy, right?
If you don’t have paper towels in the house, you can play around with size you like. Some people like a rectangle; some like a perfect square – I like a square with rounded corners. It’s really whatever floats your boat. (My finished towels are approximately 10” x 10” square, with rounded off edges, if you like the look of these and want to model yours off of those in this tutorial.)
So once you have determined your pattern that you like, you’ll just need to cut out one of each of your fabrics – one terry, one cotton or flannel.
After doing this, you will pin your fabrics right sides together. (I don’t like to waste anything, so I don’t mind that I have the ribbing through the back side of my terry. If you don’t like that, you can just cut pieces of your towel leaving the ribbed section out. :O))
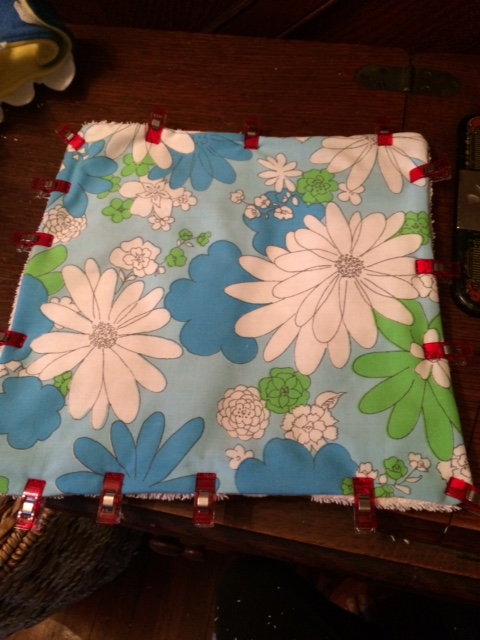
I remember looking at YouTube videos when I was teaching myself to sew and getting annoyed at being instructed to use so many pins or clips to hold my work in place. After sewing anything and everything I could dream up for the last five years, I have to tell you, there’s no such thing as too many pins or clips. It is so worth it for a better end result! So pin, pin, clip, clip and pin and clip some more, all the way around your edges. And remember to leave a turning hole (I stack my clips very close together to remind myself not to sew the turning hole closed, as shown below.)
 Now you want to sew around the edges of your towel. You can sew as close as you like here. (I sew inside of the Wonder Clips because I’m lazy and don’t cut these with much precision at all! Ha, ha!) Make sure to back-stitch at the beginning and end of your sewing. And if you like the rounded corners, be sure to sew them that way now instead of sewing a straight right-angle at your corners.
Now that you’ve sewn up your perimeter, with the exception of your turning hole, it’s time to remove your pins or clips and trim your seam allowance. When I trim seam allowance, I like to leave a larger seam allowance in the turning hole area so that it’s easier for me to tidy things up. Notice I have more seam allowance around the turning hole in the photo below:
 Now we’re ready to flip right-side out. It’s helpful to use the handle of a spoon or closed scissors to get all of your edges pushed out just right.

And now that we’ve got everything turned right-side out, we can go ahead and fold in our turning hole (as shown in picture above) and pin, pin, pin some more. Remember, there’s no such thing as too much pinning. Pinning helps to deter bunching as your sewing, which is a really good thing!
So here we are all pinned and ready to roll:
(One thing worth noting in the picture above is that on the bottom, center-right, it looks like I don’t have an even seam. I do, but this is the effect of the ribbing on the terry side. It doesn’t bother me, and I’d rather not waste any fabric and deal with this little “blemish.” If you don’t like this look, though, you’ll want to just use the portions of the towel that don’t have any decorative ribbing.)
Make sure you back-stitch at the beginning and end, and sew along the perimeter of your towel. You can go as close to the edge as you like, or a little farther is fine as well. As you are sewing, just make sure you’re smoothing your fabric to avoid any puckering or shifting as you remove your pins or clips.
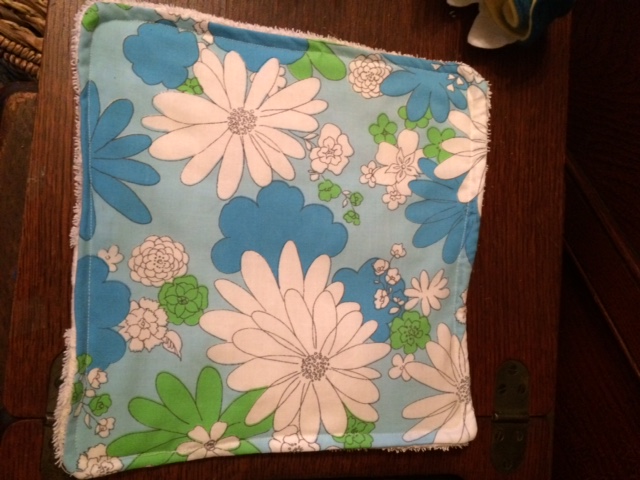
 And when you’re all done top-stitching, you’ll have this:
Looks pretty good, I think. But why not take it to the next level?! To help your fabrics hold together, and look a little more high-end, it’s nice to do a little quilting at this point.
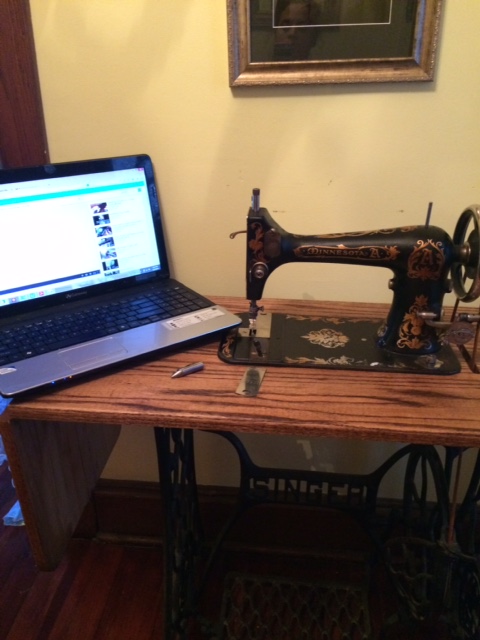
Up until now, when I was making my towels for this tutorial, I had been using my Singer 66 treadle, the one I use for everything, and, secretly, my favorite machine in my collection. But I was feeling like I wanted to try out my Minnesota A treadle that was just rigged up for free-motion quilting by my sweet Matt. It should have been perfect to quilt the tops of my towels. Operative words “should,” “have,” and “been.”
Things didn’t go well, and after 30 minutes of YouTube videos and doing a whole bunch of this —
— I went back to the 66 to finish the job. (The Minnesota project will be for another day.)
As for quilting, you can do just an “x” or a squiggly line or whatever you like.
I wanted a lot of detail, so I went with this:


I’m pretty happy with how they turned out. So far I’ve made five, but I plan to make five or ten more. With whatever I have left of the bed sheet, I will make my kids some “nakkins” in a square that’s one-quarter of the size of these towels — the perfect size for little hands.
The first set of towels I made, I did install two snaps on either end of the towels so that I could snap them together and put them on a roll. For us, they never ended up on the roll, and the snaps didn’t get used much. It really is personal preference, though. So this time, they will just say stacked until ready to use.
 Aren’t they pretty?
*If anyone reading this tutorial is interested in having me add photos and steps to install the snaps, please comment below and I can sacrifice one of my pretty towels above in the name of internet education! ;O)
My goodness, I have missed creating these tutorials! As always, would love to see photos if you use this tutorial to create!
Thanks for sewing with me!
C

I think paper towels are just sooo wasteful. I do buy them occasionally, maybe a roll every month or two, but I prefer using cloth for clean ups.
At my baby shower, I ended up receiving about 50 super cheap baby wash cloths, and I keep about a dozen in a wipes box on my kitchen counter to use like other people use
paper towels. I like your double sided ones, though, much more attractive. I will have to whip a few up soon, some for myself and some for my neighbor. Thanks for the tutorial!
LikeLike
Agreed! Paper towels are an easy lure for us to be wasteful. I have also used the old wipes containers as dispensers and thought it worked out great! However, I bet as crafters, we could do something to decorate or fancify the containers…
And I should have mentioned that these two-sided towels are our “company” towels! We are still using rags for our everyday spills! Lol
LikeLike