
Hello, hello!
Let me start off by saying that I am so excited to be adding this tutorial! Secondly, I am self-taught w/ sewing and probably go about things in the wrong way, but it works for me and I kind of like the challenge. I sort of view my creations as art, so I tend to wing it w/ a lot of things. You can tweak this pattern tons of ways (as I have myself) to get different looks, fits, etc. Look how cute they are!

In making this pair in the tutorial, I did each slipper a different way just to see what I like better. That just shows you how many different ways there are to make these.
Anyway, enough about that. Let’s jump in.
Let’s talk materials first. And, remember, you will need to decide how big your child’s foot is and how many pairs you’d like to make to determine the amount of each material you need. I got by on about a quarter yard of each as used scraps to create each pair.
Basic materials needed (and reasons you need them):
First, to create your sole pattern, you need a shoe that fits your child. You want to trace that pretty closely (a little bigger is fine) to the edge of your paper so that you can fold it in half and cut two of the exact same piece at the same time. That would look like this:

Cut out your sole piece (which will be two since you have two layers of paper here) and set one aside.
Next, you need to decide (I just do this by eye) where you think the top of the slipper should come, i.e. leaving space for an ankle to slip into the back of the shoe. Hard to explain this, but looks like this:


Basically, you want to cut a shape around the upper portion of the sole (notice that it is not right or left specific, as the soles of the feet are – more on that later) leaving yourself some extra fabric on outside of sole cut-out.
From here, you will roughly measure from the edge of your upper piece on one side around to the other side, essentially measuring around the heel of your sole piece. Mine is roughly 10 inches for a size 12-ish ballet shoe. It’s basically a long rectangle. It will look like this:
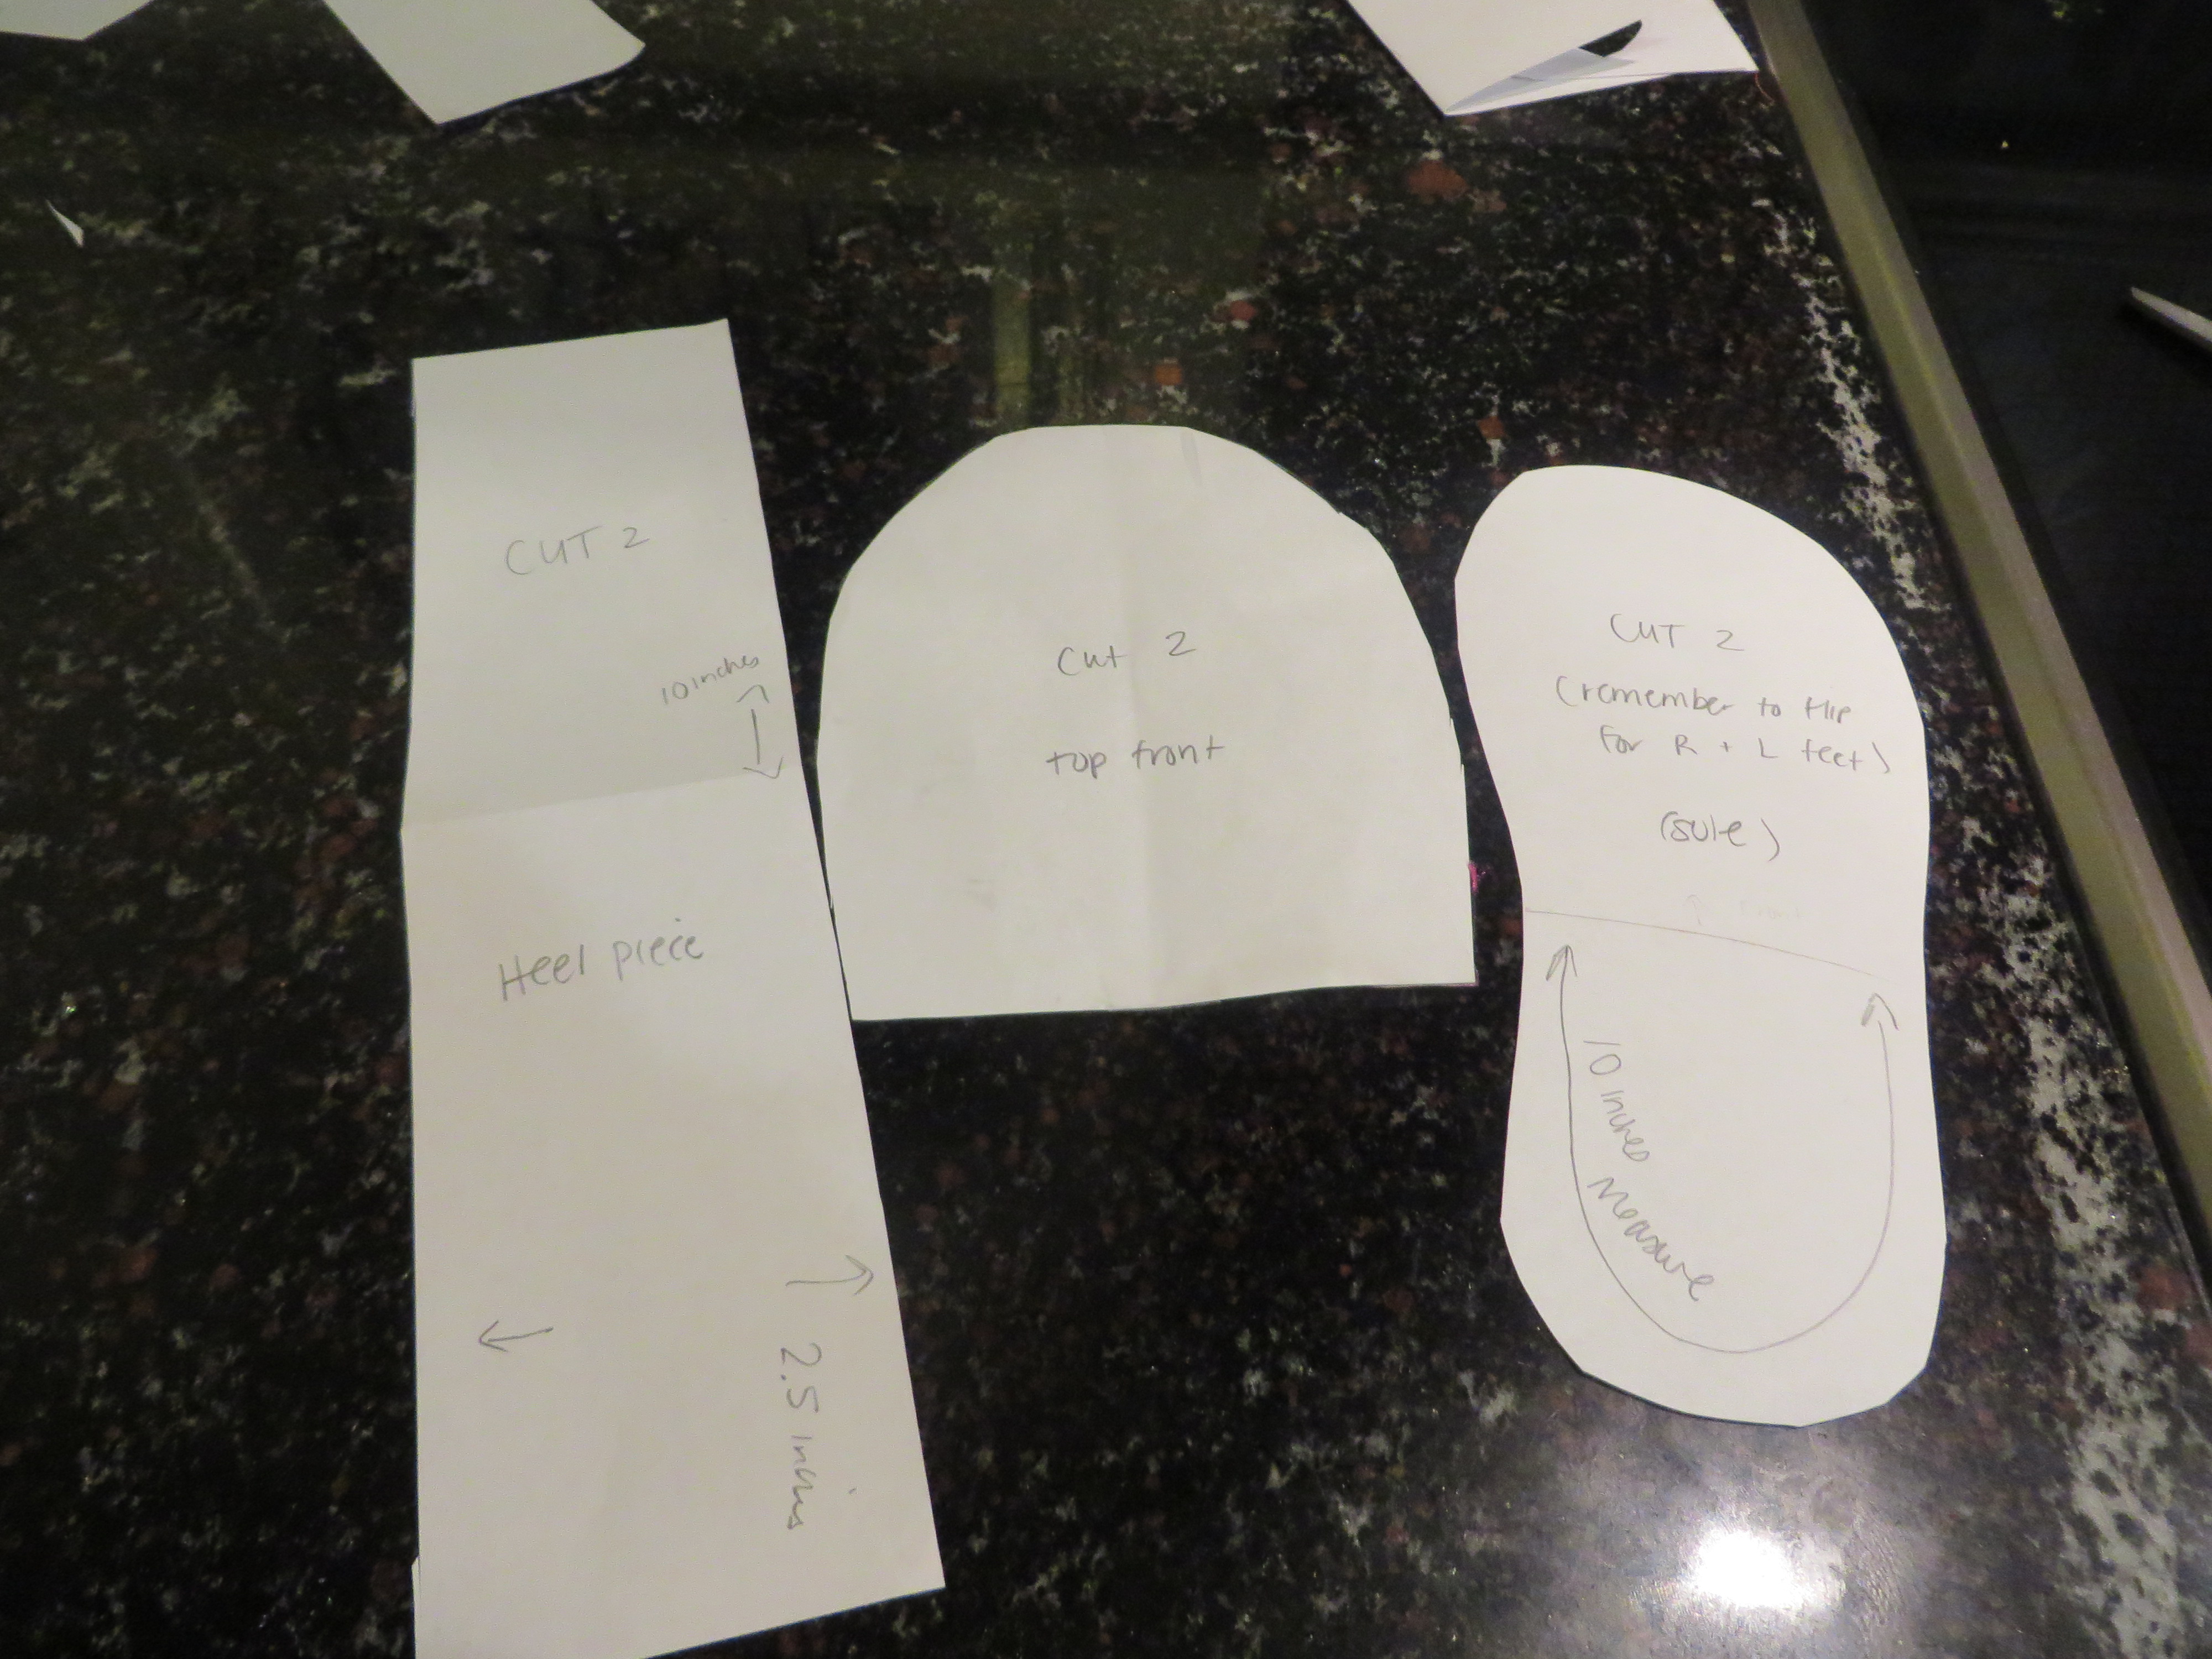
The heel piece pictured is 10 inches by 2.5 inches, but, as you will see later, that can be tinkered w/. For the pattern I created here, it was actually too much fabric and I probably could have gotten away w/ 1.75 inches to 2 inches. But, I like to make sewing art, and art is always a challenge! :O)
Moving along. Now you have your basic pattern. You will need to cut out your fabric now. I use fleece as an inner and 100% printed cotton as my outer. The exterior sole of my slippers is a faux suede. I also add in a cut of canvas
in the sole to make it a little more sturdy.
The amount of fabric you need will depend on the size of the slipper you are making, obviously. But I would bet a quarter of a yard would be more than sufficient. I always like to have more fabric than I need in case there’s a need for a re-do, but that’s just me.
Now that you have your fabric all selected and ready to go, you will need to cut two of the uppers, two of the heel band pieces, and one of each right and left foot sole. And if you are going to reinforce w/ the fleece, as I do, you will need to also cut the same amount as above in your fleece. (This means two fleece uppers, two fleece heel band pieces, and one of each right and left sole.)
You also need to cut out two sole pieces w/ your suede cloth. *With the suede it is important to pay attention to what you are cutting as you need to have two ‘pretty’ sides that are right and left feet.
So you have this:

I like to start w/ the upper sole piece first. (As stated before, there are many, many ways to do this — and this is only my third pair, so I’m sure I may possibly do this another way in the future — but I think this is easiest and quickest.)
Place your ‘pretty sides’ together of your upper slipper piece, fold in half, and mark the half point. We’re looking like this now:
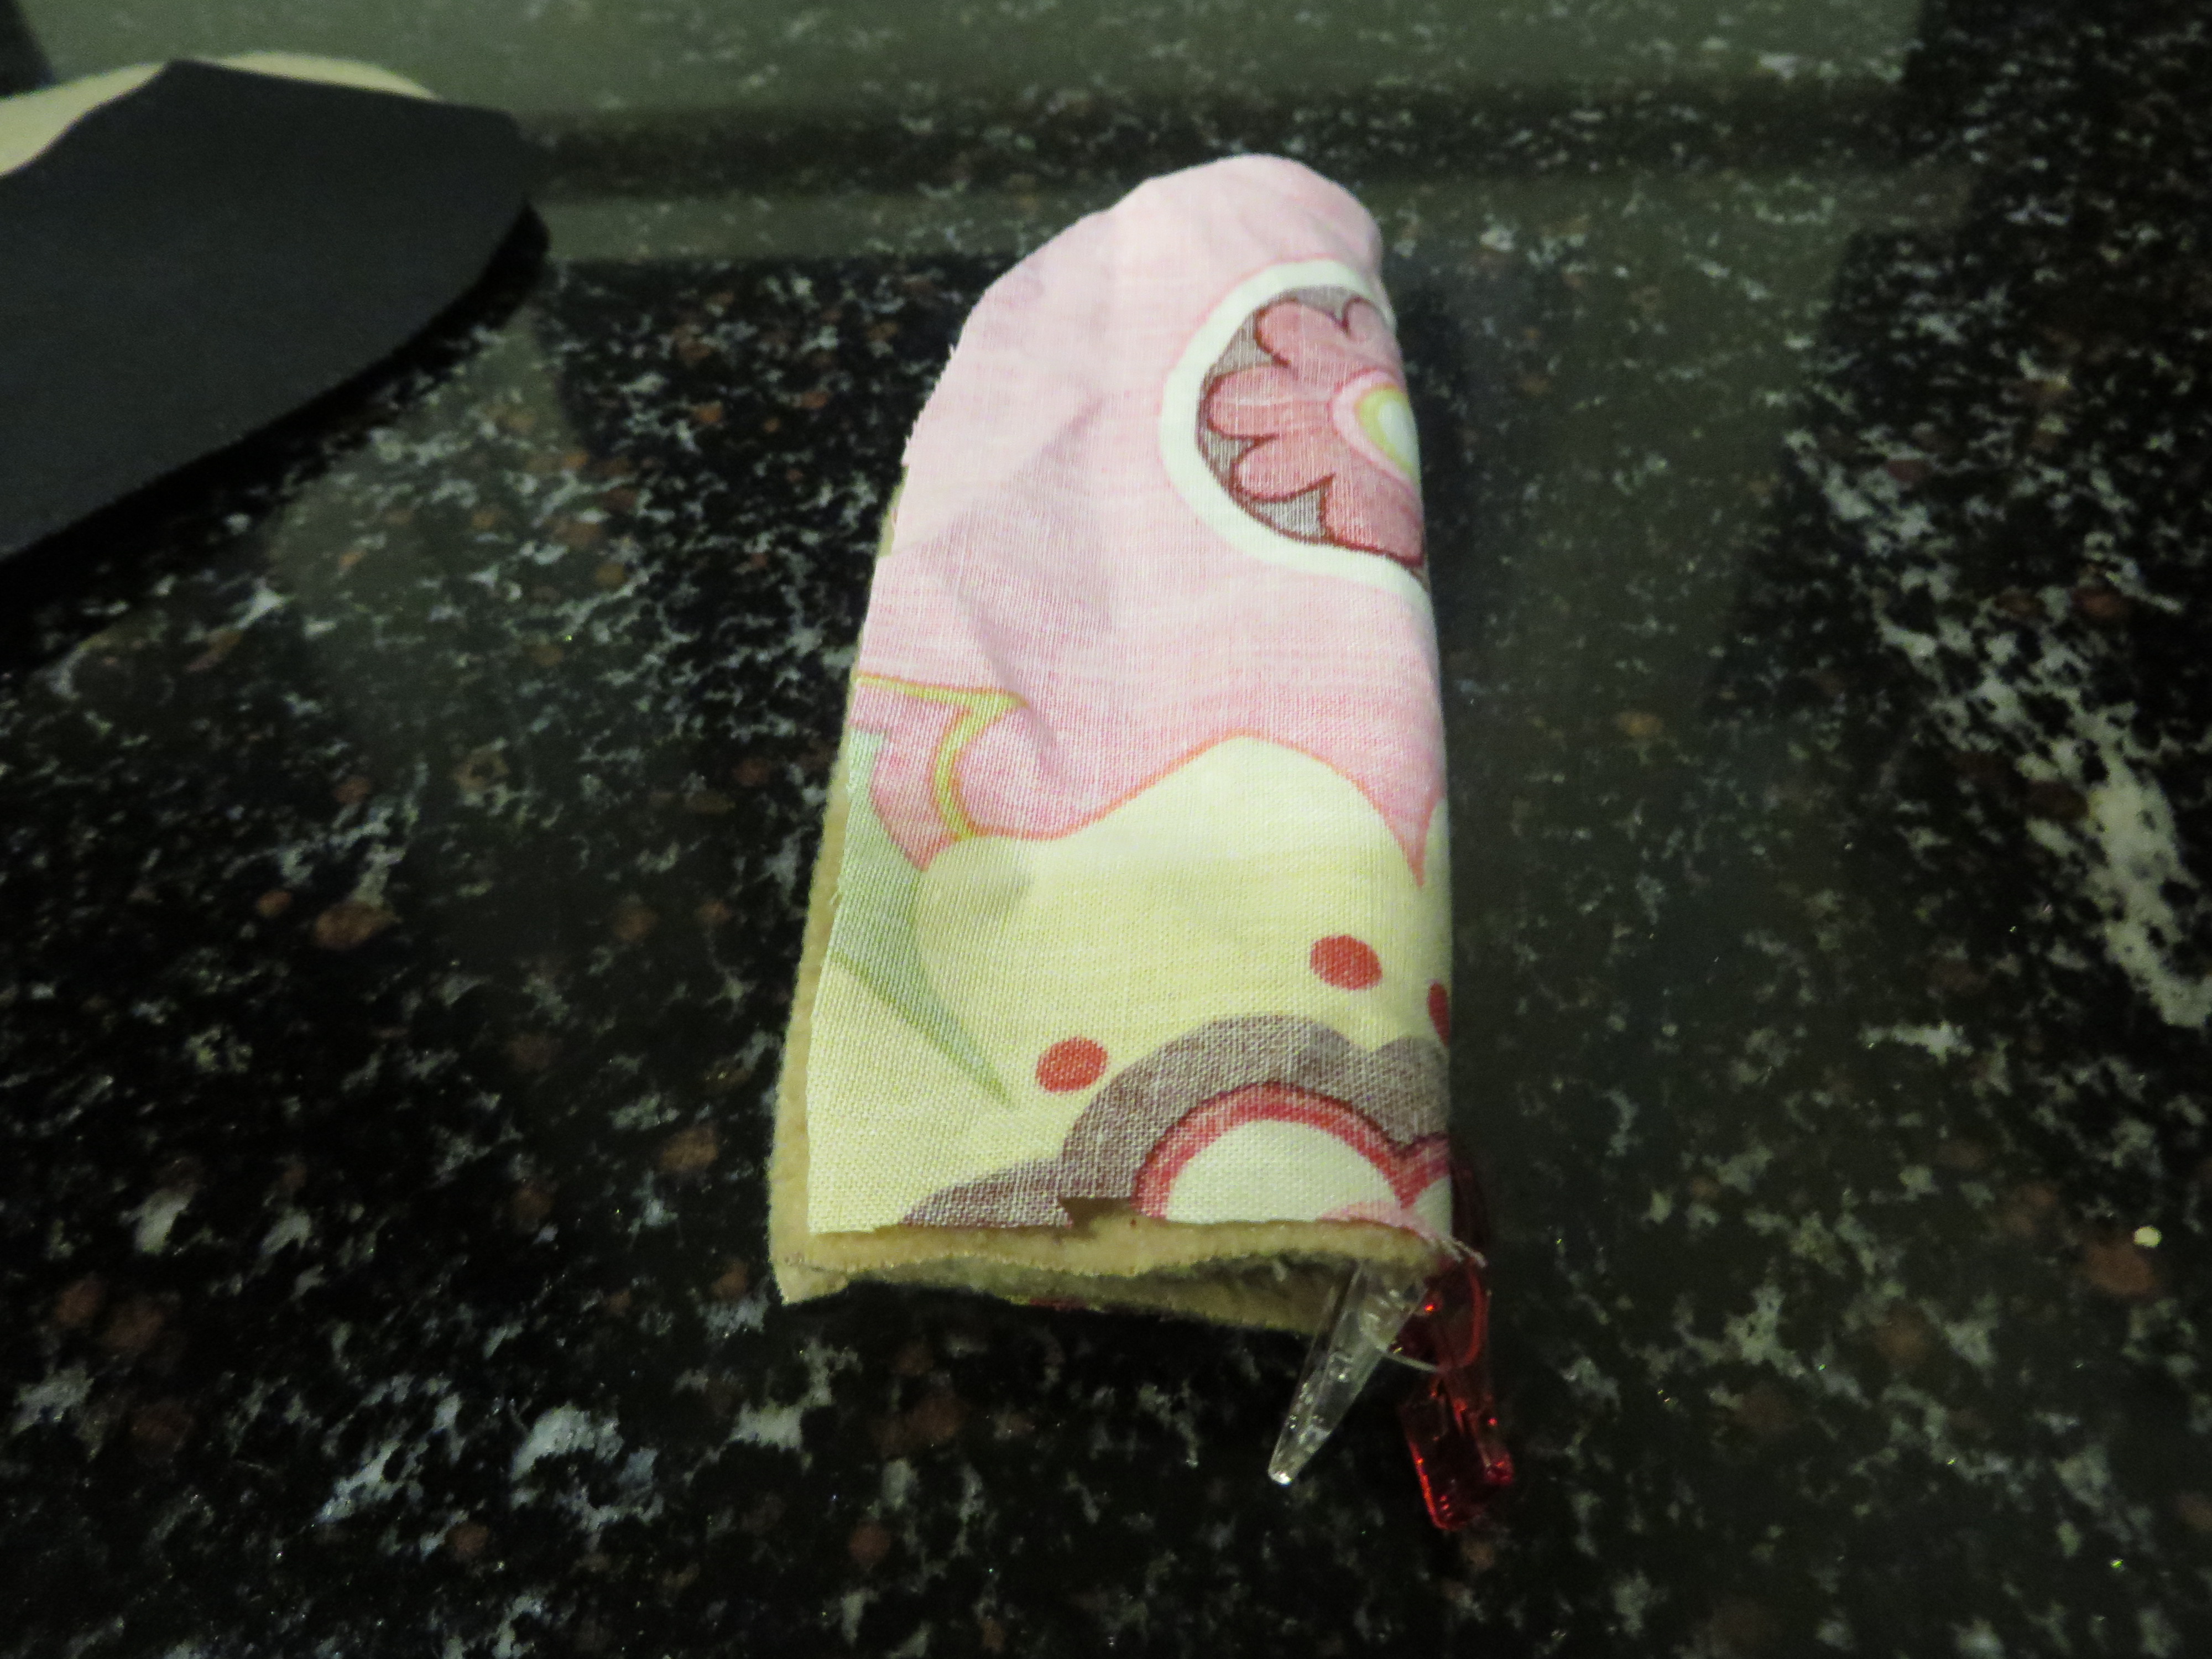
Take this to your sewing machine and sew a half-oval around your midline. Trim out the middle and shape up your seam a little.
Looks like this:
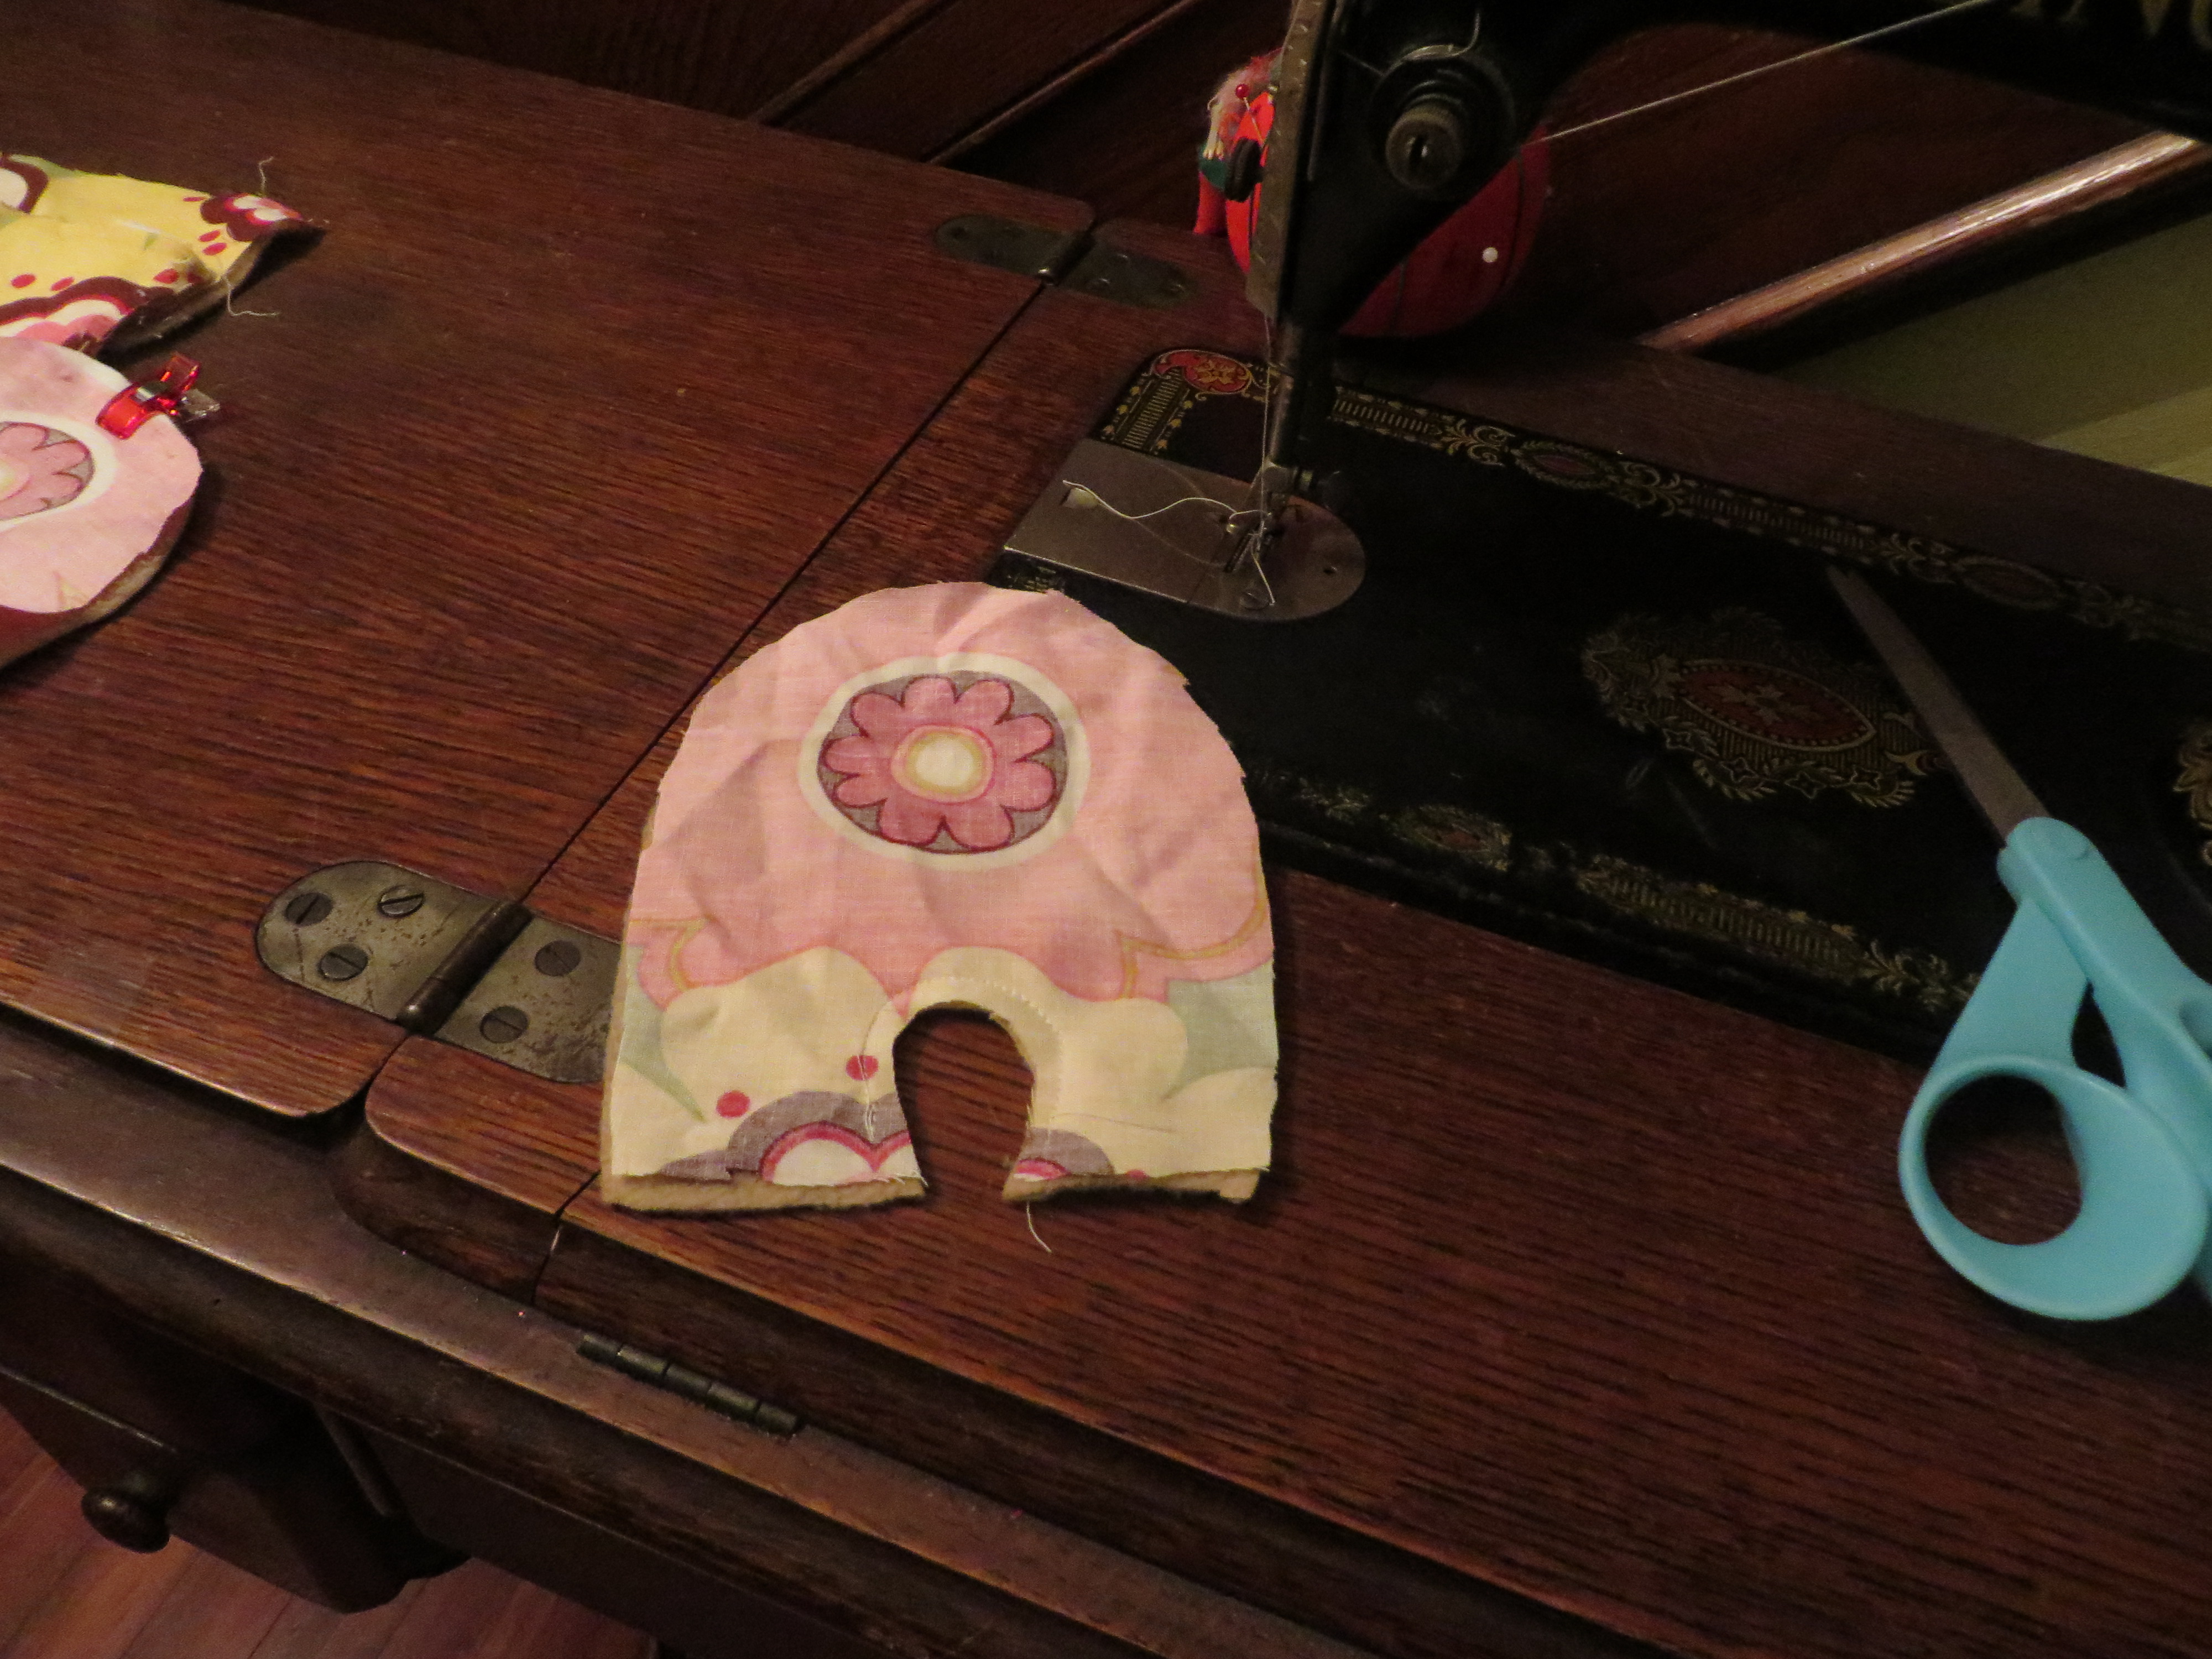
Next, turn your work right-side out (this is a pain in the butt for me!) and pin fabric straight. Topstitch it so that it looks pleasing to you.
You’re looking like this now:

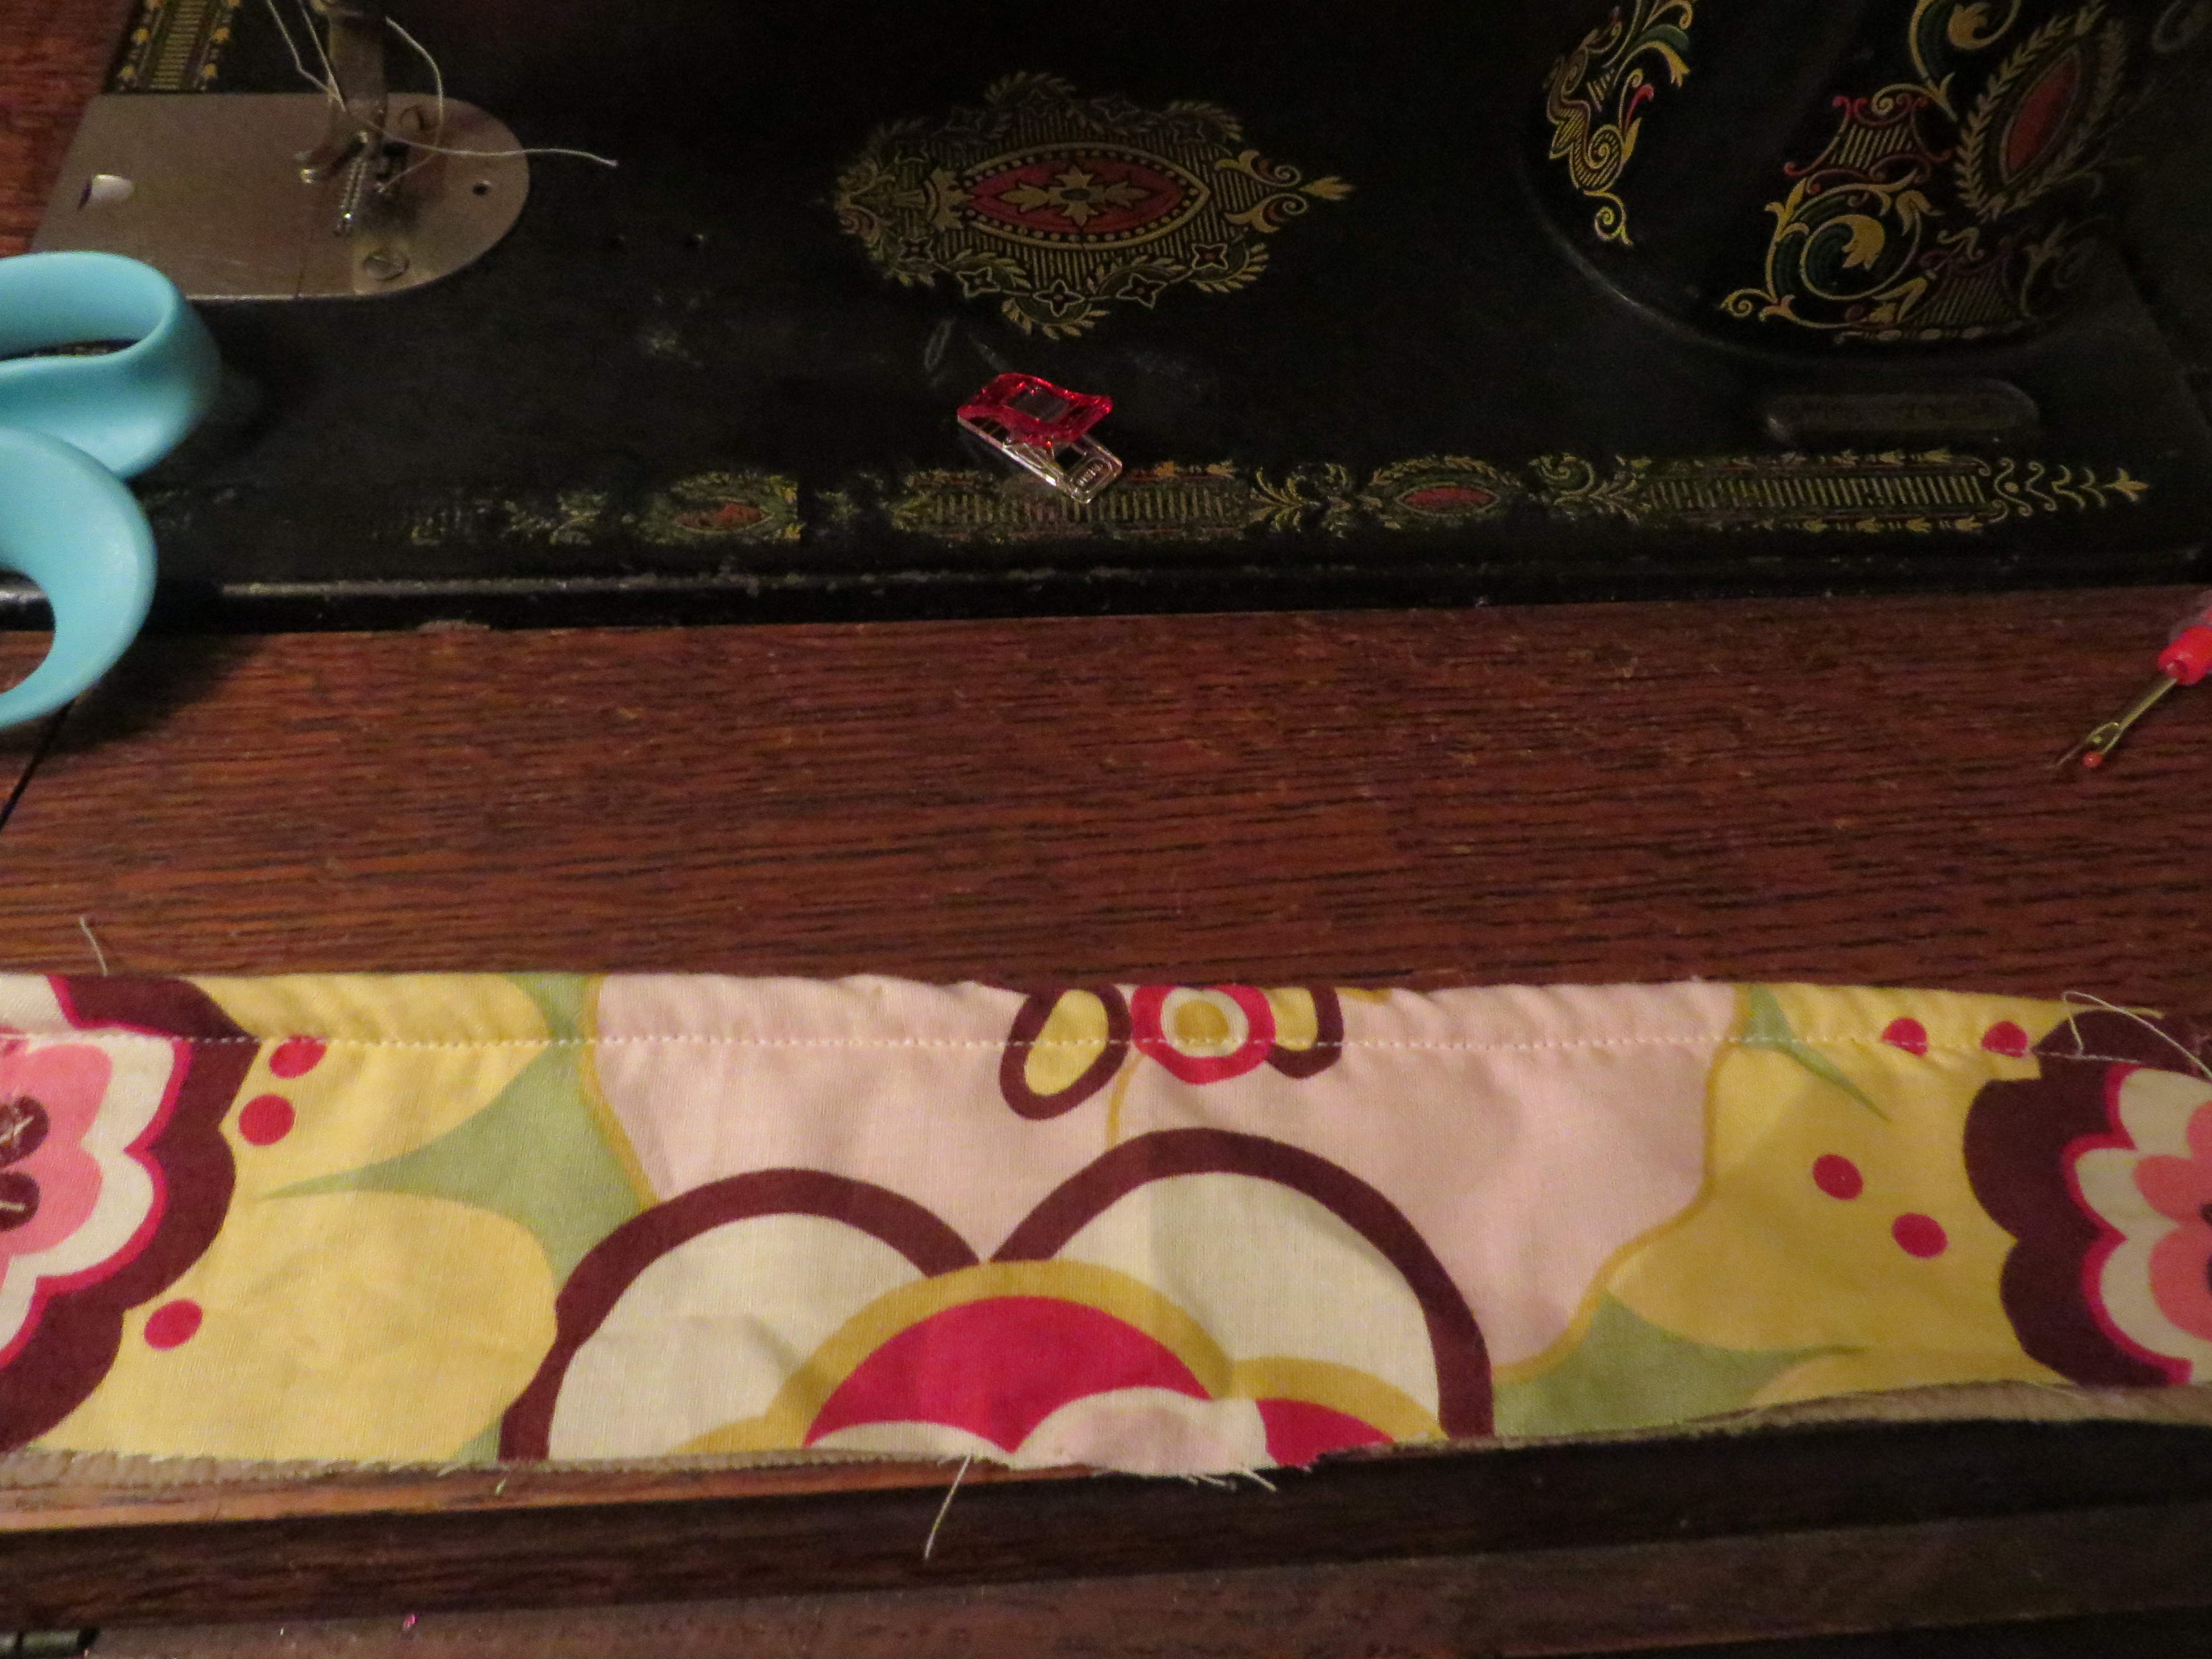
Grab your heel band piece and fold over your edge and hem one side — the long way.
It will look like this:
Now we need to attach our heel band piece to our upper slipper piece. You’ll want to line up your hem lines, place fabric ‘pretty’ sides together, and sew.
Like this:

Repeat this for the other side as well.
Now, when you flip your work right-side out, you have this:

And now it’s time to assemble our sole pieces. Remember, you want to be sure to always sew right sides together. So turn your top portion of your slipper back to inside out,and make sure that the first piece touching the pretty side of your slipper is the suede.
This is the line-up here:
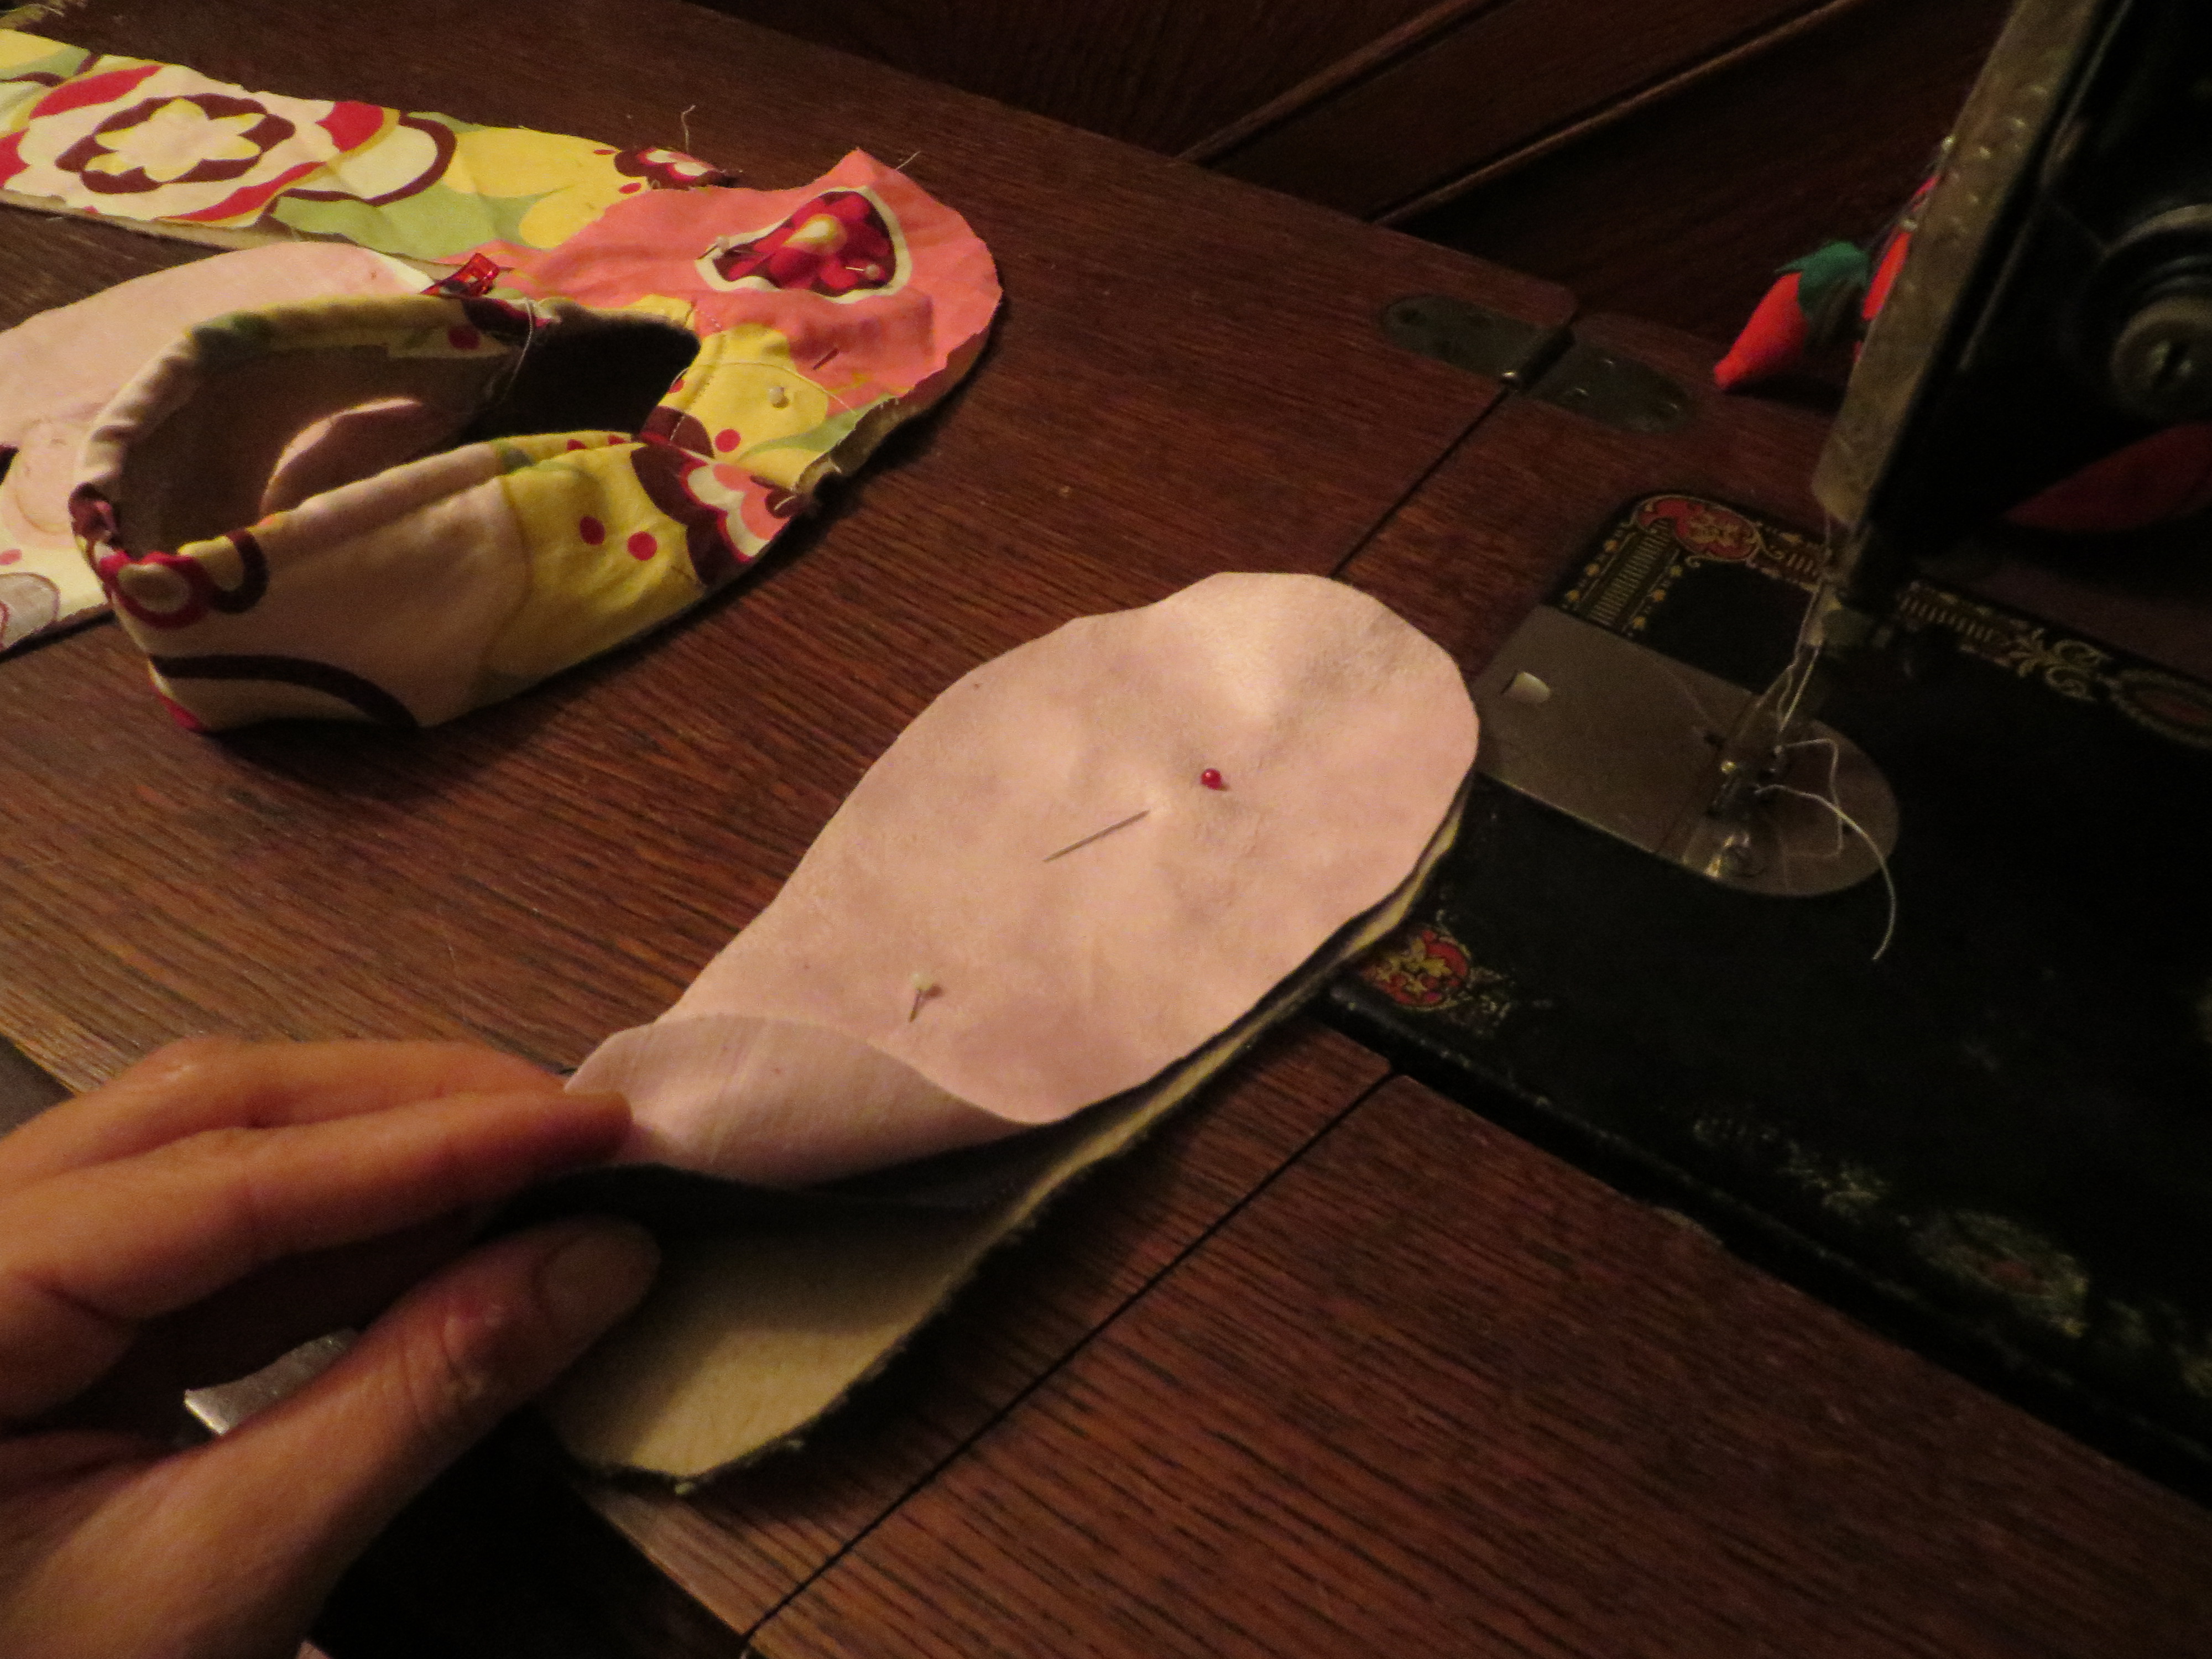
If you’re more precise than I am in making your pattern, this next part will be a breeze. I do things fast and sloppy sometimes, so this part is always a little wonky for me. Basically, you need to lay your top portion on top of the sole and pin very, very, very meticulously to your edges. I like to cheat, so i like to have a nice, big margin of error. So you will see in these next few pictures that I have a lot of extra fabric hanging over the edges. Maybe I’ll try to calculate it better next time, but probably not! :O)
And here you are w/ it all pinned together:
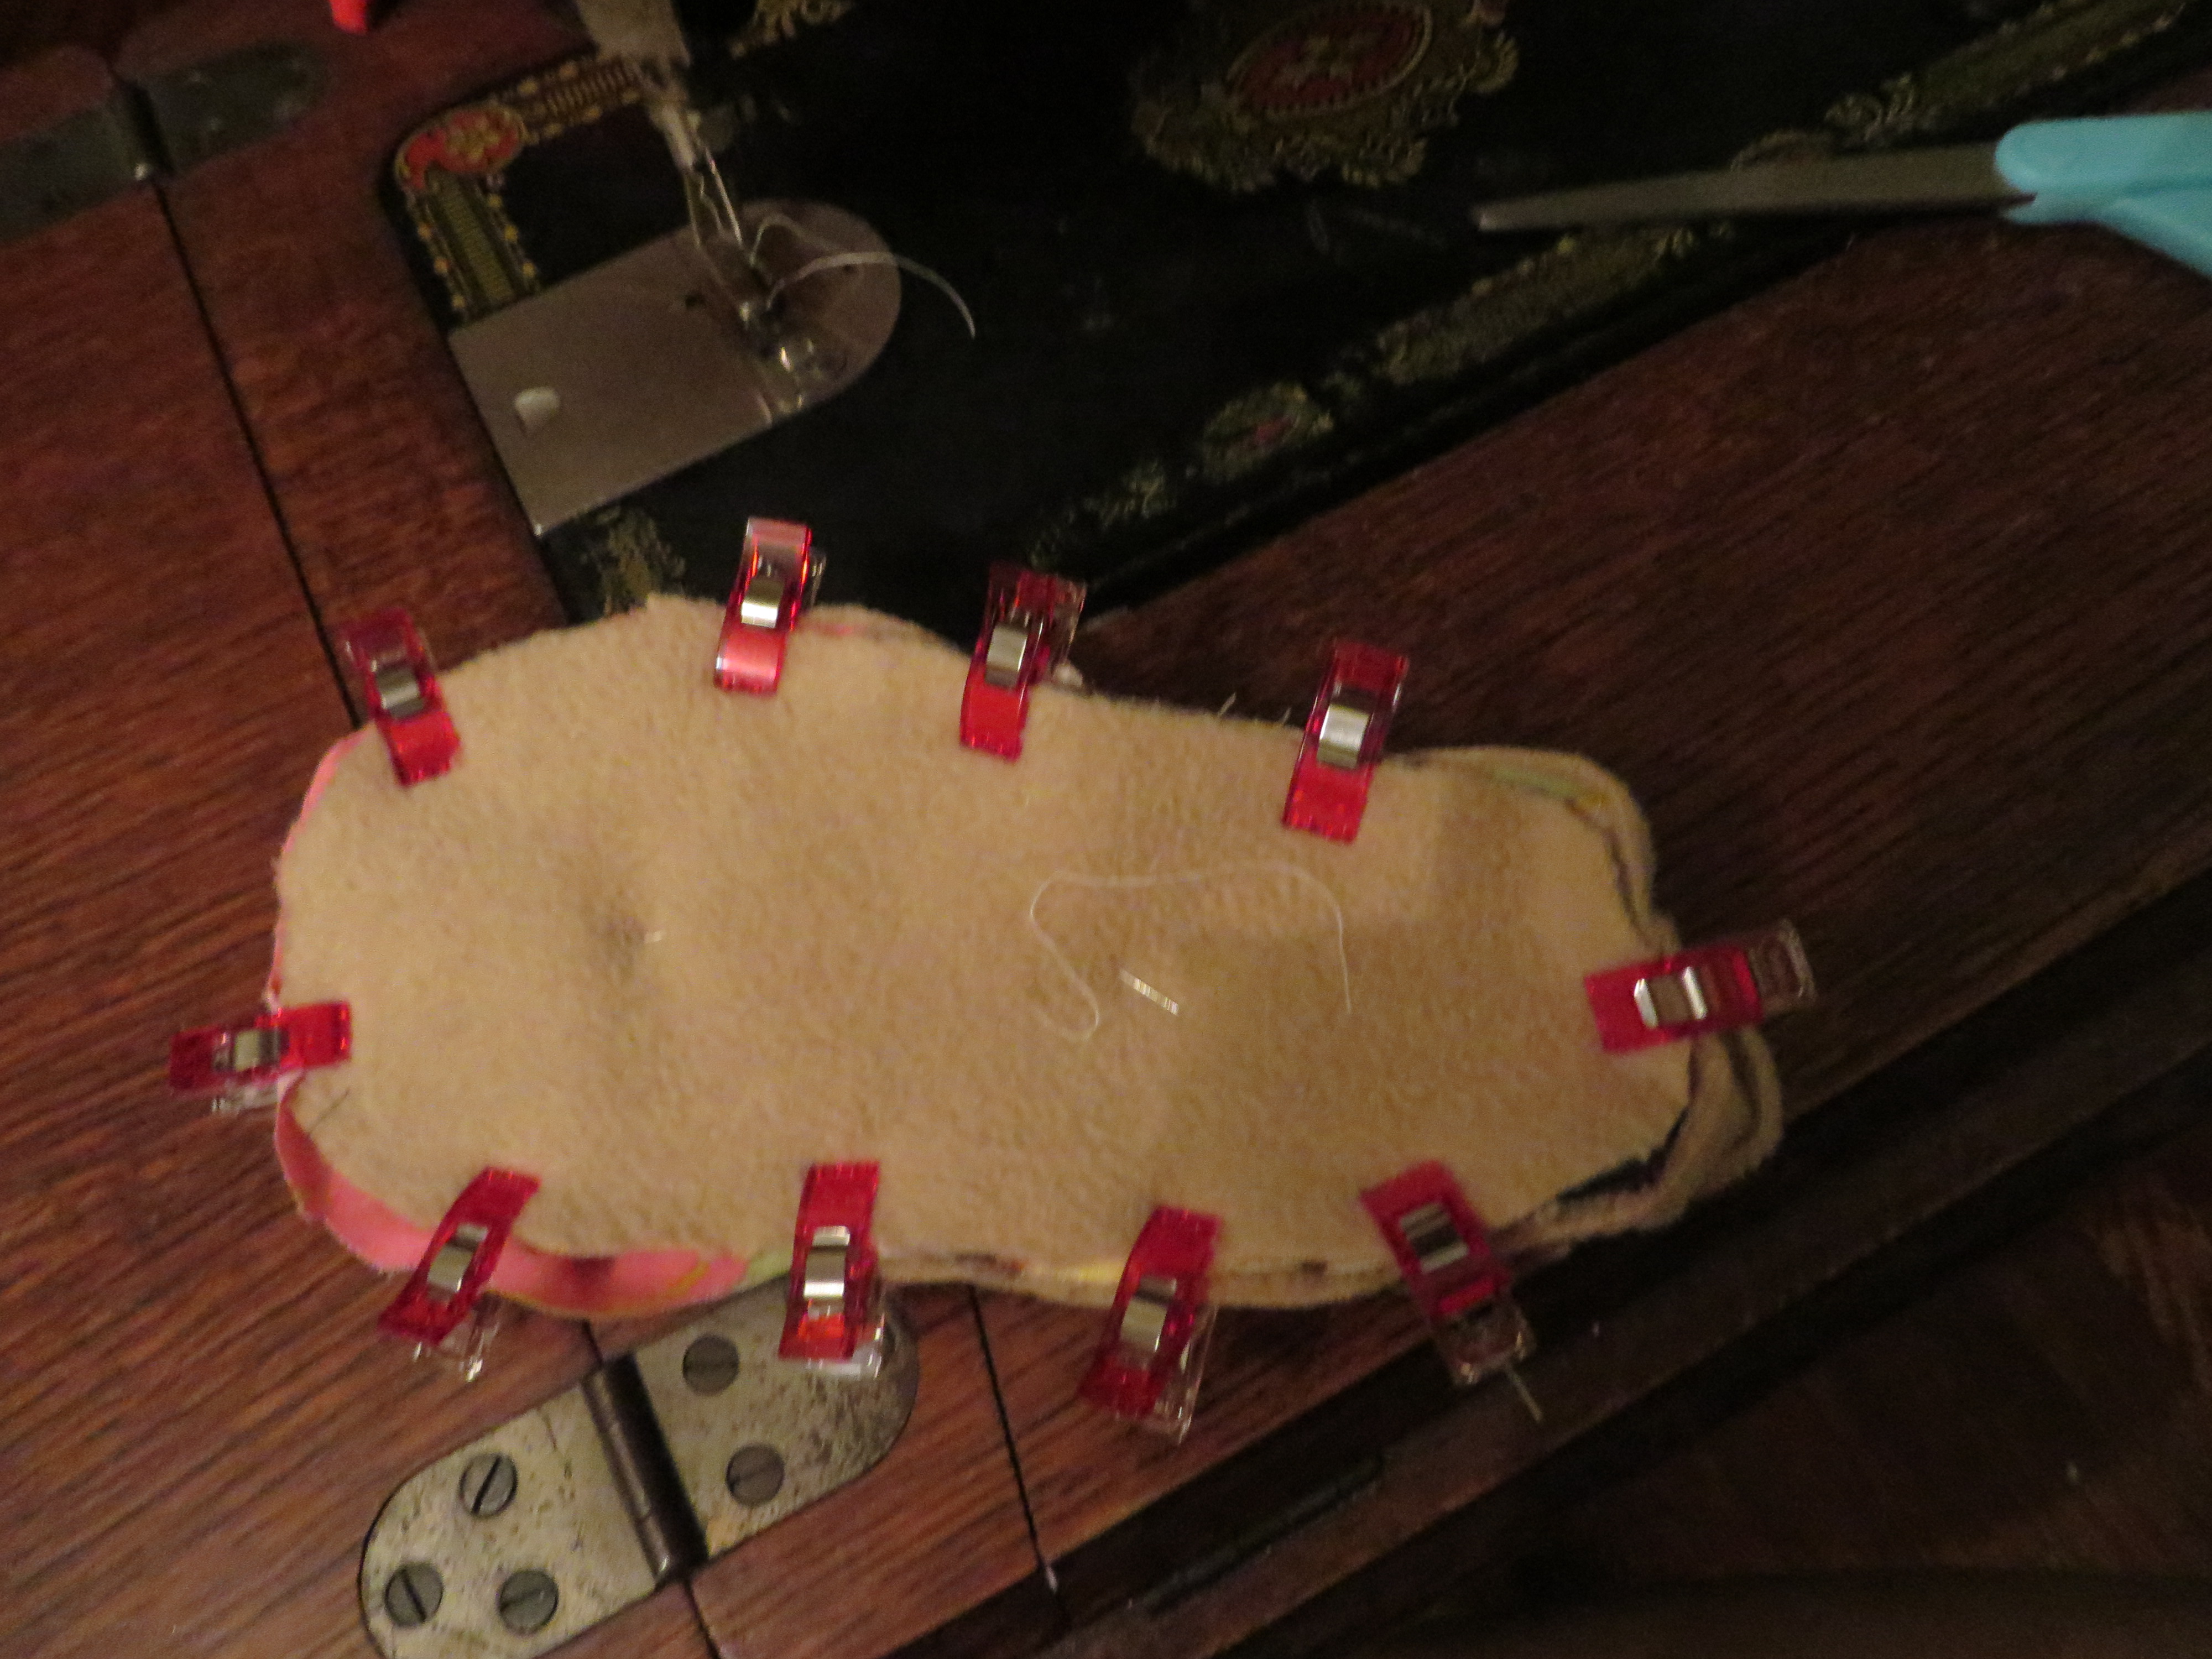
Sew along your edges, making sure to sew through all of your layers. Trim tightly to seams, and turn right-side out!
Almost done!
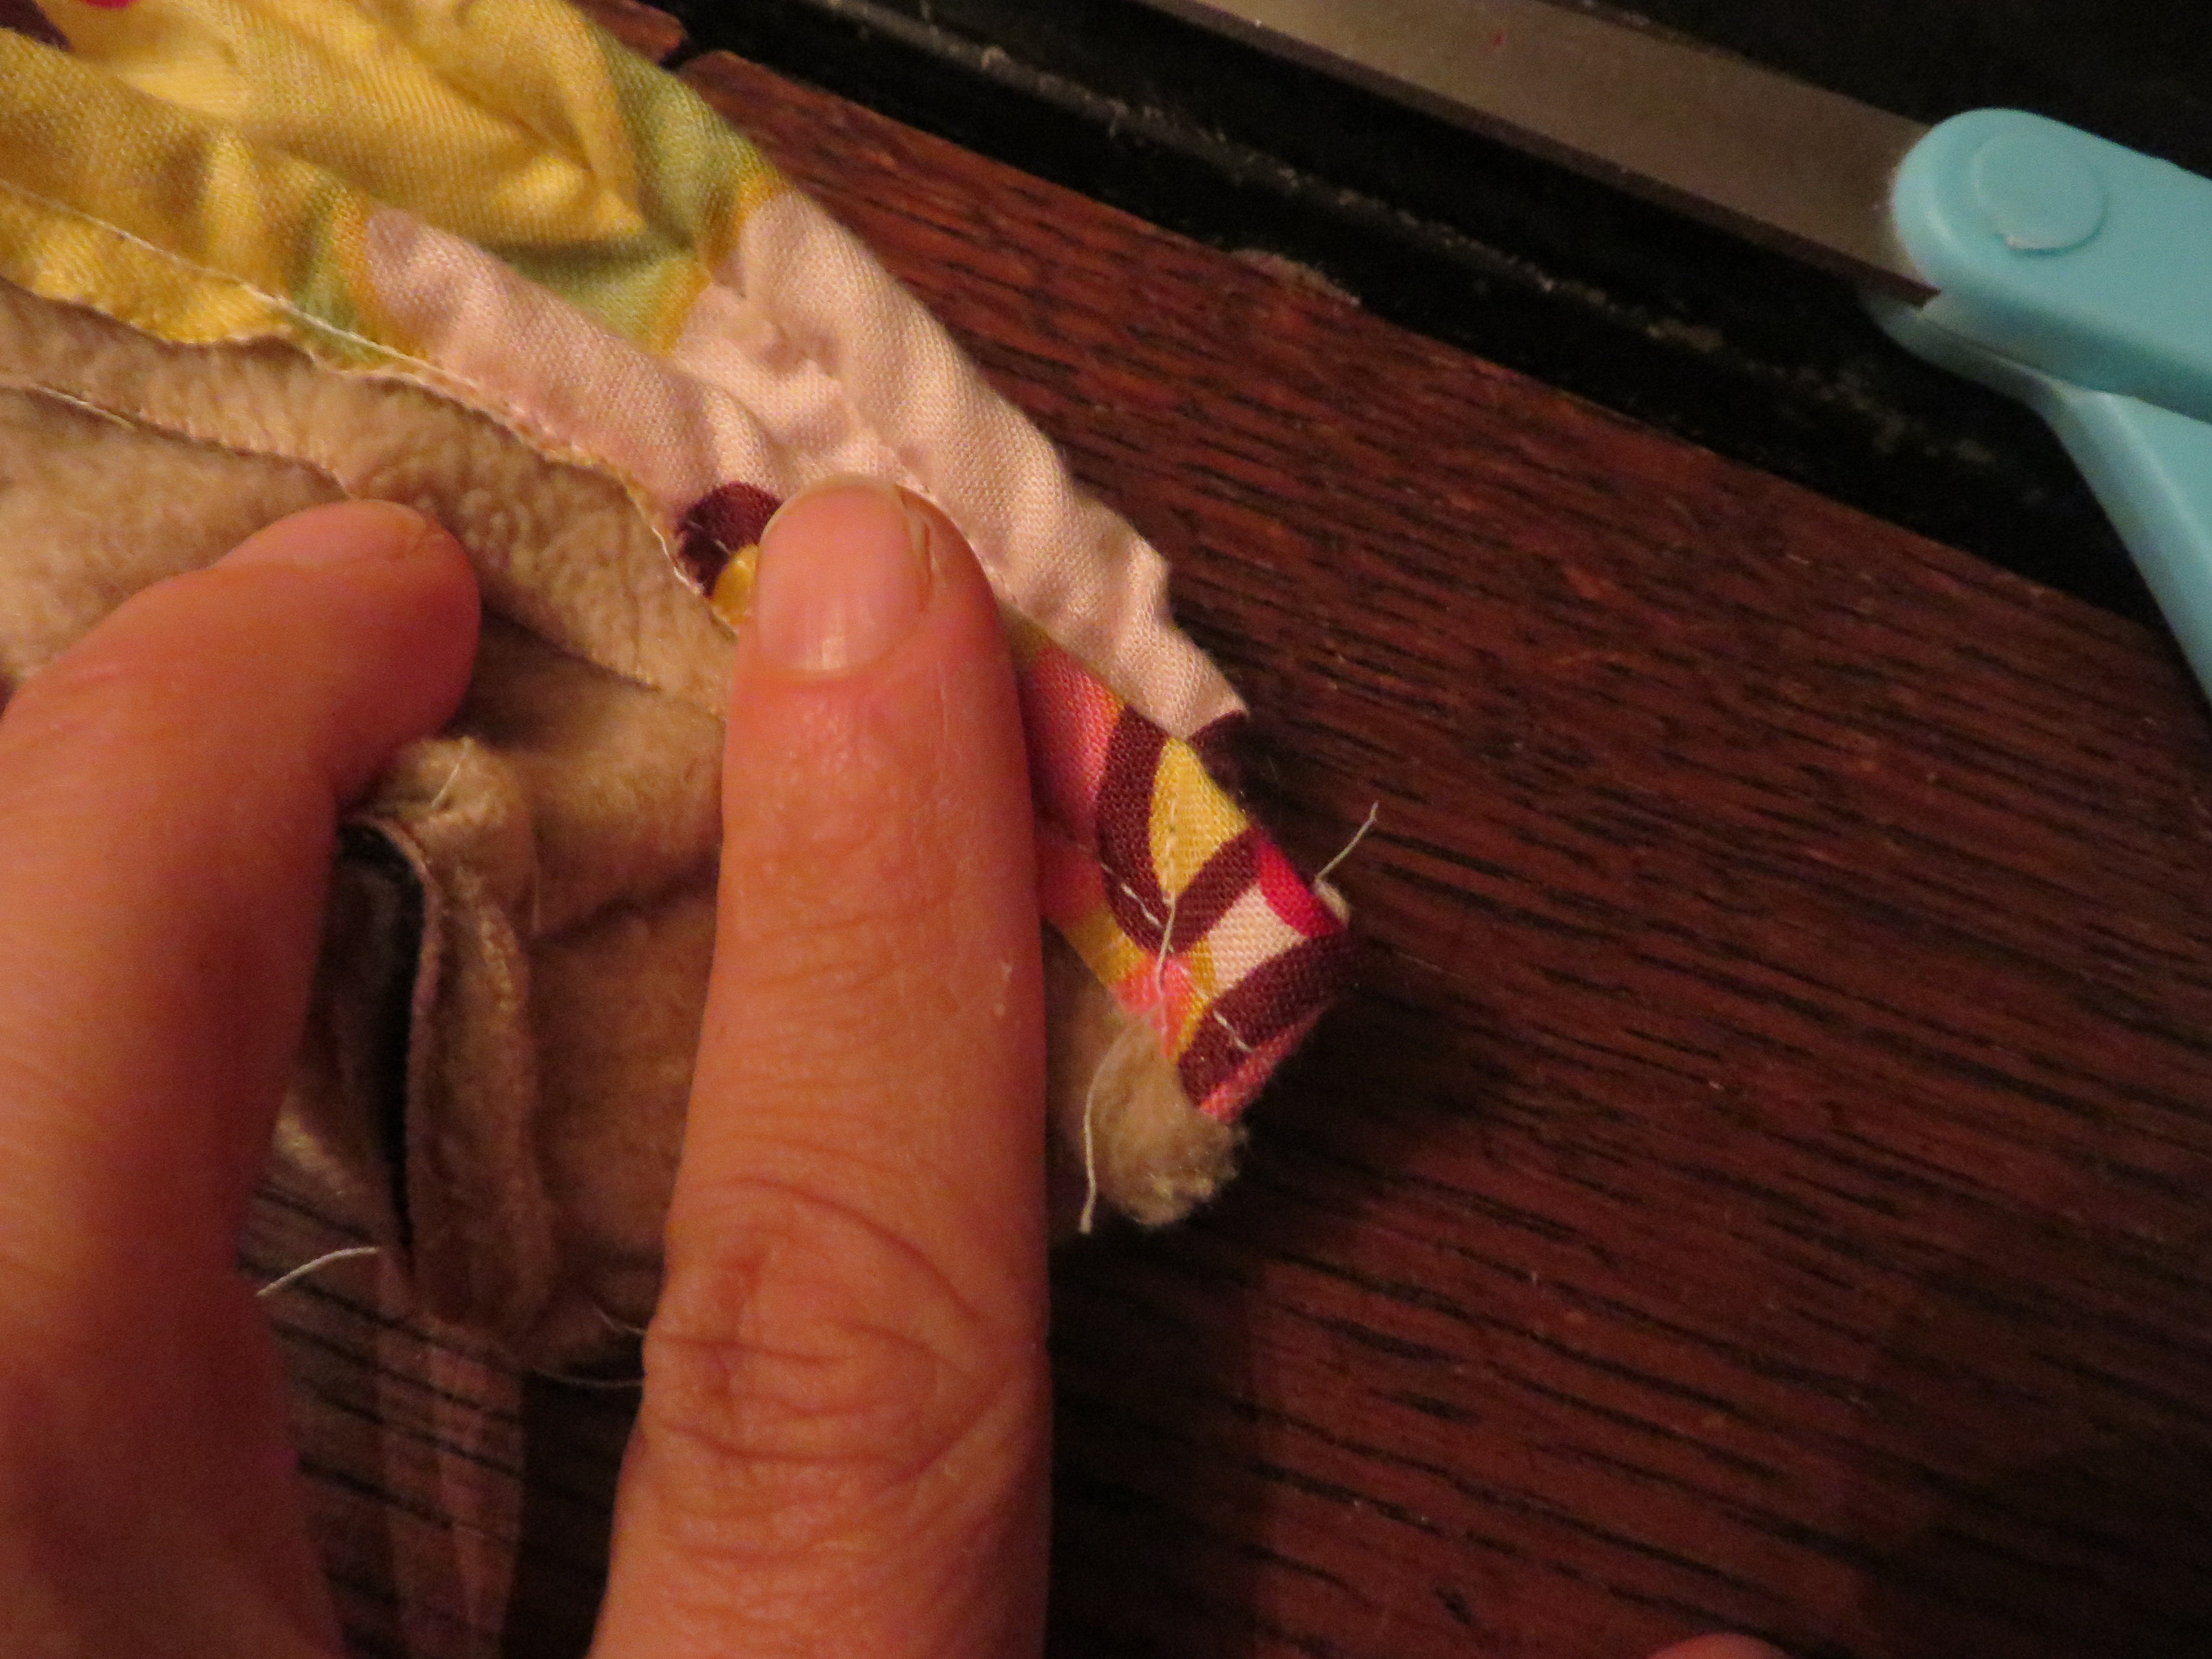
I like to tighten up my seams on the sides and at the heel at this point to give the slipper a little ‘hug’ to the foot. (You can totally eliminate this by putting an encased elastic around the entire opening of your slipper as I have done in the pink satin slippers that will be pictured at the end of the post, but I like this way just as much.)
To do this, you need to pucker inside the seams at the sides and heel of the foot, like this:
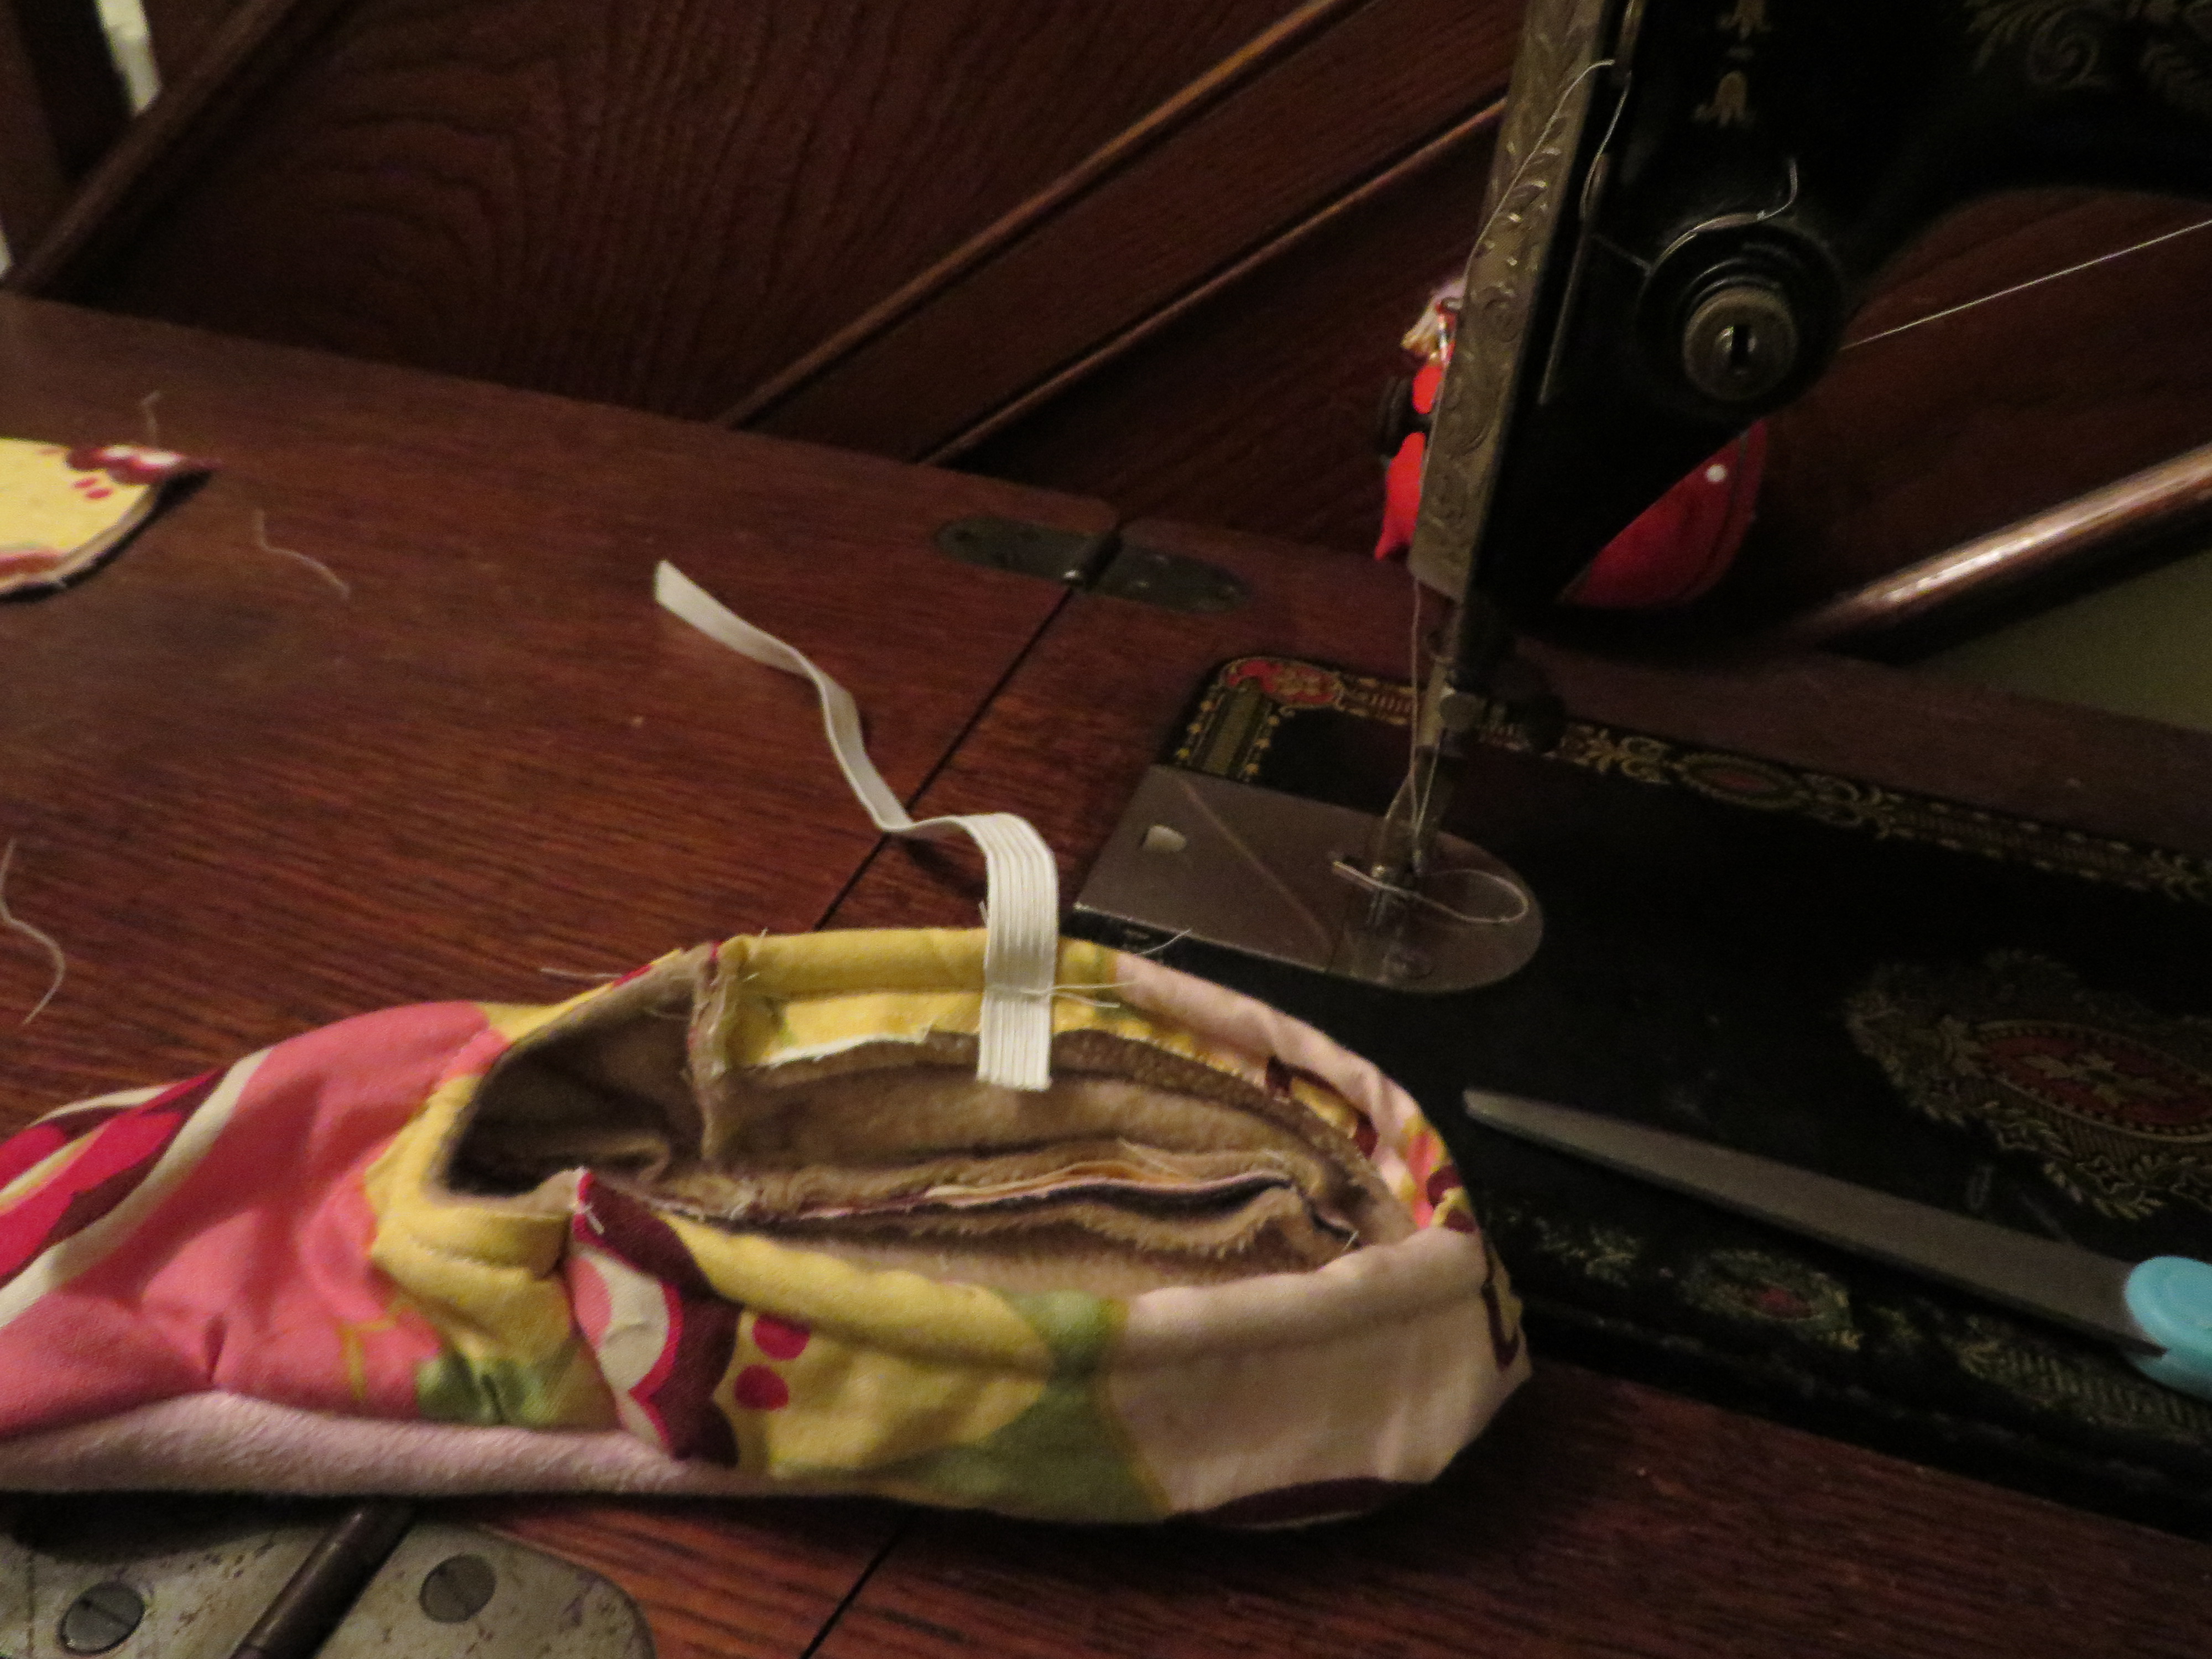
In this next photo, you will see that I am adding elastic across the top of the ankle just like a traditional ballet slipper. This is done by simply stretching a piece of elastic across the opening as you like it and tacking it down on both sides. Please note in this picture how the heel looks like it would grip onto a person’s heel since we did the pucker and diagonal stitching.
*This is the size elastic that I like to use because it’s not too big and not too small.
And you are done! You can embellish w/ buttons, ribbon, whatever you like!
And here are a few pairs that I have made for my daughter:


I would love to see how yours turn out!
Chiara
