
Good Wednesday morning!
Let’s start today with one of my favorite things – a tutorial that will help you create something that will personalize your space in a major way!
Of course, since I am fabric-obsessed, I appreciate the perfect curtain to complement a room. Matt and I moved out young and didn’t have anything beyond mini-blinds for years. When we bought our first house in our early 20’s, I was so jazzed to go curtain shopping! Finally, we’d be decorating a place the way we wanted to decorate it.
The curtains I wanted were gorgeously out of budget, but,oh, so nice to look at. They were long and flow-y, and pattern-y. All great qualities in window decor. But as a college student (me) and a five-years-out-from-college youngster (Matt), the curtains that we actually ended up getting were nothing special and weren’t all that nice-looking. (And they still weren’t cheap, either!)
I had always loved the long, flowing, fancy style curtains and was sure that’s what I’d have someday. And then I fount out I’m severely allergic to dust mites. (They are everywhere, and they love to live in dusty, flowing curtains, of course!) And then I had children – children who like to rip and tear tug and pull and roll themselves into long, flowing fancy curtains. (Animals!)
I’ve since learned that your preferred style of curtains is much like your preferred style of clothing, color, etc. It will change from time to time.
Several years ago, back when I was just learning the ropes with sewing, I was in major need of some kid-safe curtains. Luckily, right around this time, my interior decorating style changed to something more modern and simple. I decided that I wanted to expose more of the beautiful almost 100-year-old window trim and give the kids less temptation to roll themselves up in the curtains.
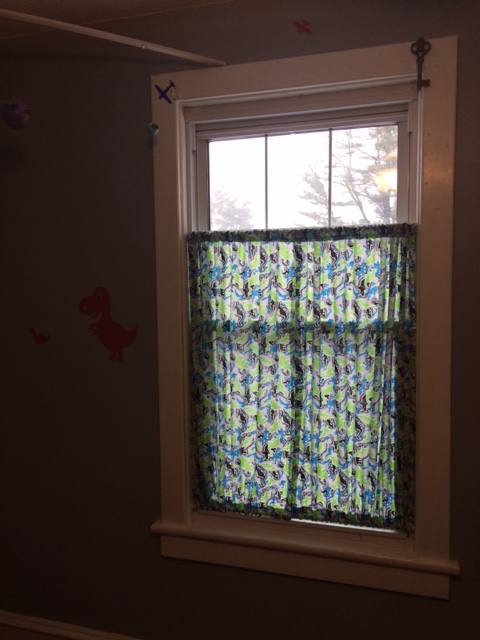
And here are some around-the-house pictures of that compromise (apologies in advance for horrible lighting):

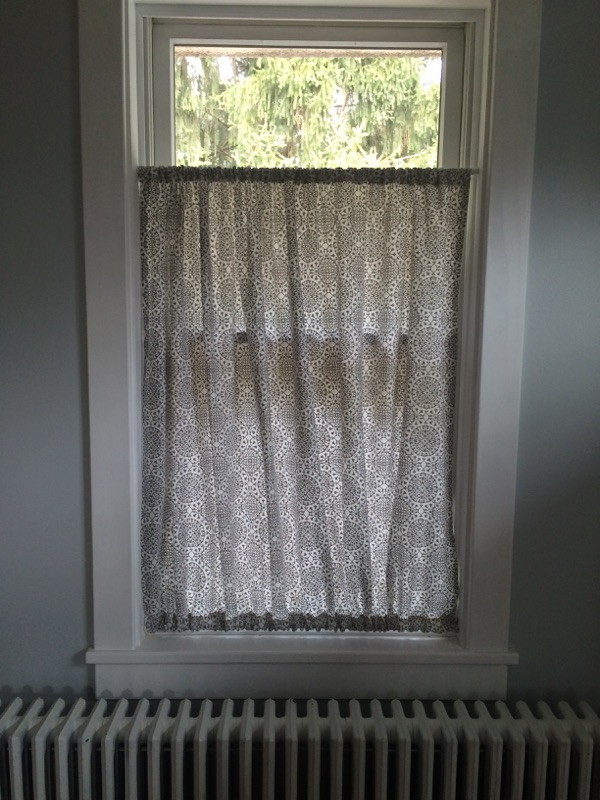
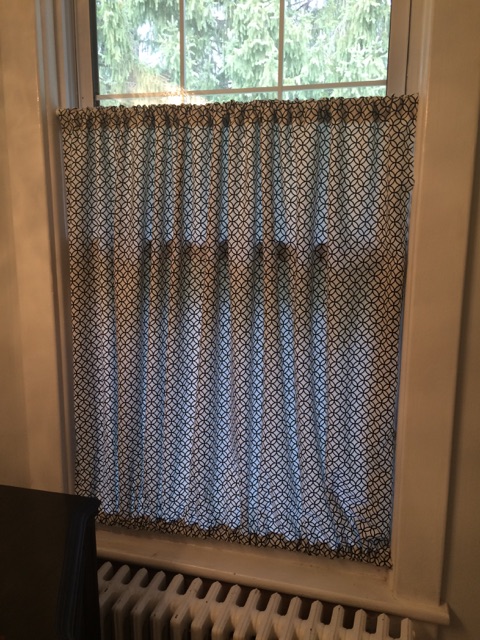
You guessed it! They are just rectangles of fabric with a loop at the top and bottom to thread your extension rod! And they look so modern/high-fashion (to me) for the very little effort it takes to make them! Super-duper simple! (They’re so easy and take up such little space, that you could really make a few sets and change them out with the seasons, even!)
Let me show you how easy these are!
I used the following:
100% cotton home decor fabric from Joann’s (which happens to go on sale often – yes!!) (You could also use upcycled bedsheets, table linens, etc. if you’re a fellow cheap chick!)
corresponding thread
scissors
pins or Wonder Clips
an iron
free and clear spray starch (if you have respiratory allergies/sensitivities) or regular heavy starch (optional – this just makes your folds nice and crisp)
tension rod (of appropriate width for your window)
and a sewing machine (subliminal vintage sewing machine plug- https://www.facebook.com/groups/VintageSewingMachines/…)
For some mid-post eye-candy, I used this machine on the curtains in this tutorial:

Step 1. Determine how much and what type of fabric you’d like. I like 100% cotton home decor fabric for two reasons – first, it’s affordable, especially with the Joann’s coupons; and, second, it’s easily washable. (Also, remember if you are picking a pattern that the pattern should run vertically and look pleasing. Example: horizontal stripes on a curtain panel may not be the look you’re going for!)
This really is easy and no fuss. I don’t mess or worry much about the height of the curtain panel, because that is determined by the measurements that the manufacturer uses. For instance, I think most of the Joann home decor fabric is around 45 inches in height (or something close to that). I lose roughly five inches (if I remember correctly) when I make my top and bottom loops, and that’s fine with me. The most important thing is to get the right amount of crinkle so that it doesn’t look like you just have a bed sheet hanging over your window.
All of our windows are made with a panel that is twice the width of the window I wanted to cover. So if you have a 30-inch wide window, for example, you need to cut a 60-inch wide piece of fabric for your panel. I think this ratio looks nice. It’s not too crinkly, and not too just, you know, blah, either.
Step 2. Cut out your widths that you need (if you didn’t have them cut that way at your fabric cutting counter). So you will have rectangles cut to the width you need and the height will be left alone.
Step 3. With your fabric oriented the way it will be on the window (60-inches running side to side, or horizontal, in the example I am using for this tutorial), you want to spray your starch (if desired), fold over, clip, ( if desired), and iron one of the sides 1/4 inch to 1/2 inch in. (Note: This step is not a necessity, and can be omitted. I do think it creates a more professional look, though, and do recommend doing this.)
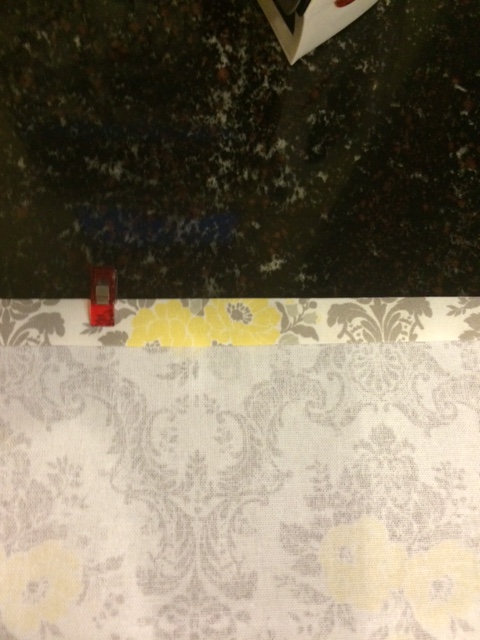 Step 4. Once you have ironed over your first fold on the side of your panel, remove clips (if you used them) and fold it over another 1/2 to 1 inch (folding width is personal preference) and repeat Step 3. Clip this in place.
Step 5. Repeat this process on the other side of your curtain panel.
Now you have raw edges on your top length and bottom length of your window panel w/ two finished side edges. Perfect.
We will now make the loops for your curtain rods.
Step 6. On your top unfinished section of your curtain panel, you will be doing the same thing that you did along the vertical edges of your panel. You want to fold down 1/4 to 1/2 inch of your raw edge. Use your spray starch if you’d like, and iron this down so that it’s nice and even. Also, make sure your measurements of your fold are as close to the same as possible on each corner.

Step 7. Now we have to create our loop for the rod. We want to fold this section over again, with a larger clearance this time, to accommodate the tension rod. Use spray starch, again, if you’d like, and iron down in place. Be sure to measure your fold heights at the corners to be sure they are as close to equal as possible. Iron folds nice and crisp.
(I used a large, close-to-3-inch fold on this example, but I believe the other windows in the house have a 2-inch fold on this step. Whichever you choose is fine, just be sure to consider that the larger fold you use on this step, the shorter height your curtain panel will have. These curtains are for a front window of the house in a very dark room, so the shorter they are, while providing some privacy, the better.)

Step 8. Repeat Step 7 for your bottom panel edge.
Step 9. Go back through, quickly, and just measure up at your corners. Hopefully, your folds at each corner match your other corners.
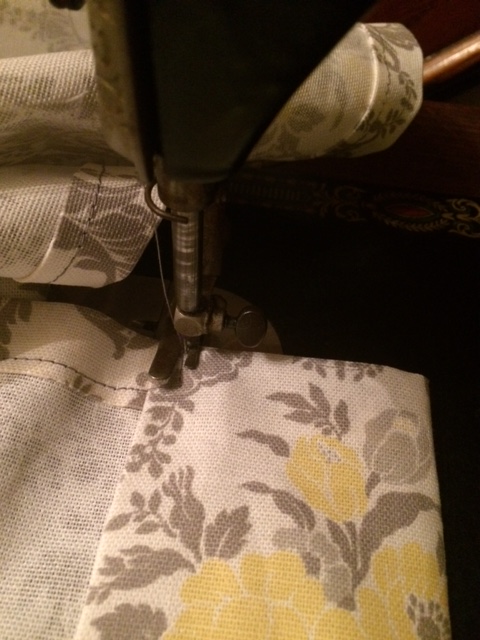
Step 10. Sew your curtains!
Be sure to sew along your inside hems on the sides of your curtain panel, but do not sew your loops closed! (In photo below, as I am approaching the loop area of my panel, I will sew straight down, as not to sew my curtain rod loop closed. Also, just to reinforce the area, sometimes I sew back over this location, pictured below, a few times.)
You’re done! You’ll spend more on the rods than you will on the fabric if you get it on sale or with a coupon (or upcycle!)! And this can easily be changed (by playing with your measurements) to make a window treatment with multiple panels, if you’d like.
As I mentioned before, I like this style because of ease of cleaning, ease of sewing, cost of small pieces of fabric, and the fact that it deters kids from tugging on rods that could fall on them.
I think curtains are possibly the most perfect beginning sewing project ever!

Sorry for the horrible lighting, again. Maybe it’s a sign that I need to move somewhere with more mild winters. Honey, are you reading this…?
(And I think I seriously just had a brain-storm about quilted curtain panels! Might have to see if anyone has done that and how it turned out!)
Until our next project,
C

I think I want to do something like this in my babies nursery.
LikeLike
Super option for a nursery! You must be getting close?! Sending healthy, happy momma and baby wishes your way!😊
LikeLike
Yes, I am 31 weeks
LikeLike