
Good morning!
I think today is the special day that I will finally write up the tutorial for the latest car seat poncho that I made. Both kids are sleeping in, and I have a few quiet moments to construct a tutorial that makes sense!
I adore these ponchos. First off, I love them because I get to make them. A very close second is the fact that my kids just drool over them. A.S. would have one for every day of the week if she could. (And I might be crazy enough to sew that many if I didn’t anticipate my husband questioning all those extra fabric purchases!) As for safety, they are just so much better for car seat use than a big, bulky winter coat. Both A.S. and A.W. get in their seats, hold up their ponchos for me to buckle them in, and then drop the ponchos down to snuggle in. The fact that they’re reversible and fairly water-resistant when you use fleece are just added perks to their cuteness! I have seen many of these popping up from other crafty moms, so I think it’s a trend with some staying power.
Chances are, if you’re here, you are a personal friend who I’ve made one of these for or you’re a sewist who wants to see how I made it and maybe make one yourself. Whoever is here reading this, I’m glad you’re here. These take a lot of time and patience, but they are worth it. Many car seat ponchos that you see are quick and easy to make. The addition of tulle edging that I use in my ponchos for girls is tedious and very time-consuming. But, seriously, I think it really shows in the end result that the crafter took the time and effort to make it over-the-top! That’s what I’m going for.
One friend of mine in particular received a polka dot w/ pink tulle poncho (will show picture in this tutorial) for her daughter’s third birthday. This was the first one I had ever made, and I spent hours on it trying to make it just right. They still get compliments on it and tell me how much they like it. That is the reason that I sew and give in a nutshell! The only thing better than giving something that you have made from scratch is getting that great feedback from the receiver. It makes me feel good and motivates me to keep creating!
So enough of me ranting about how sewing gets me all emotional. We need to dive into this before one of my kids wakes up and throws a wrench in my plans of completing this write-up today!
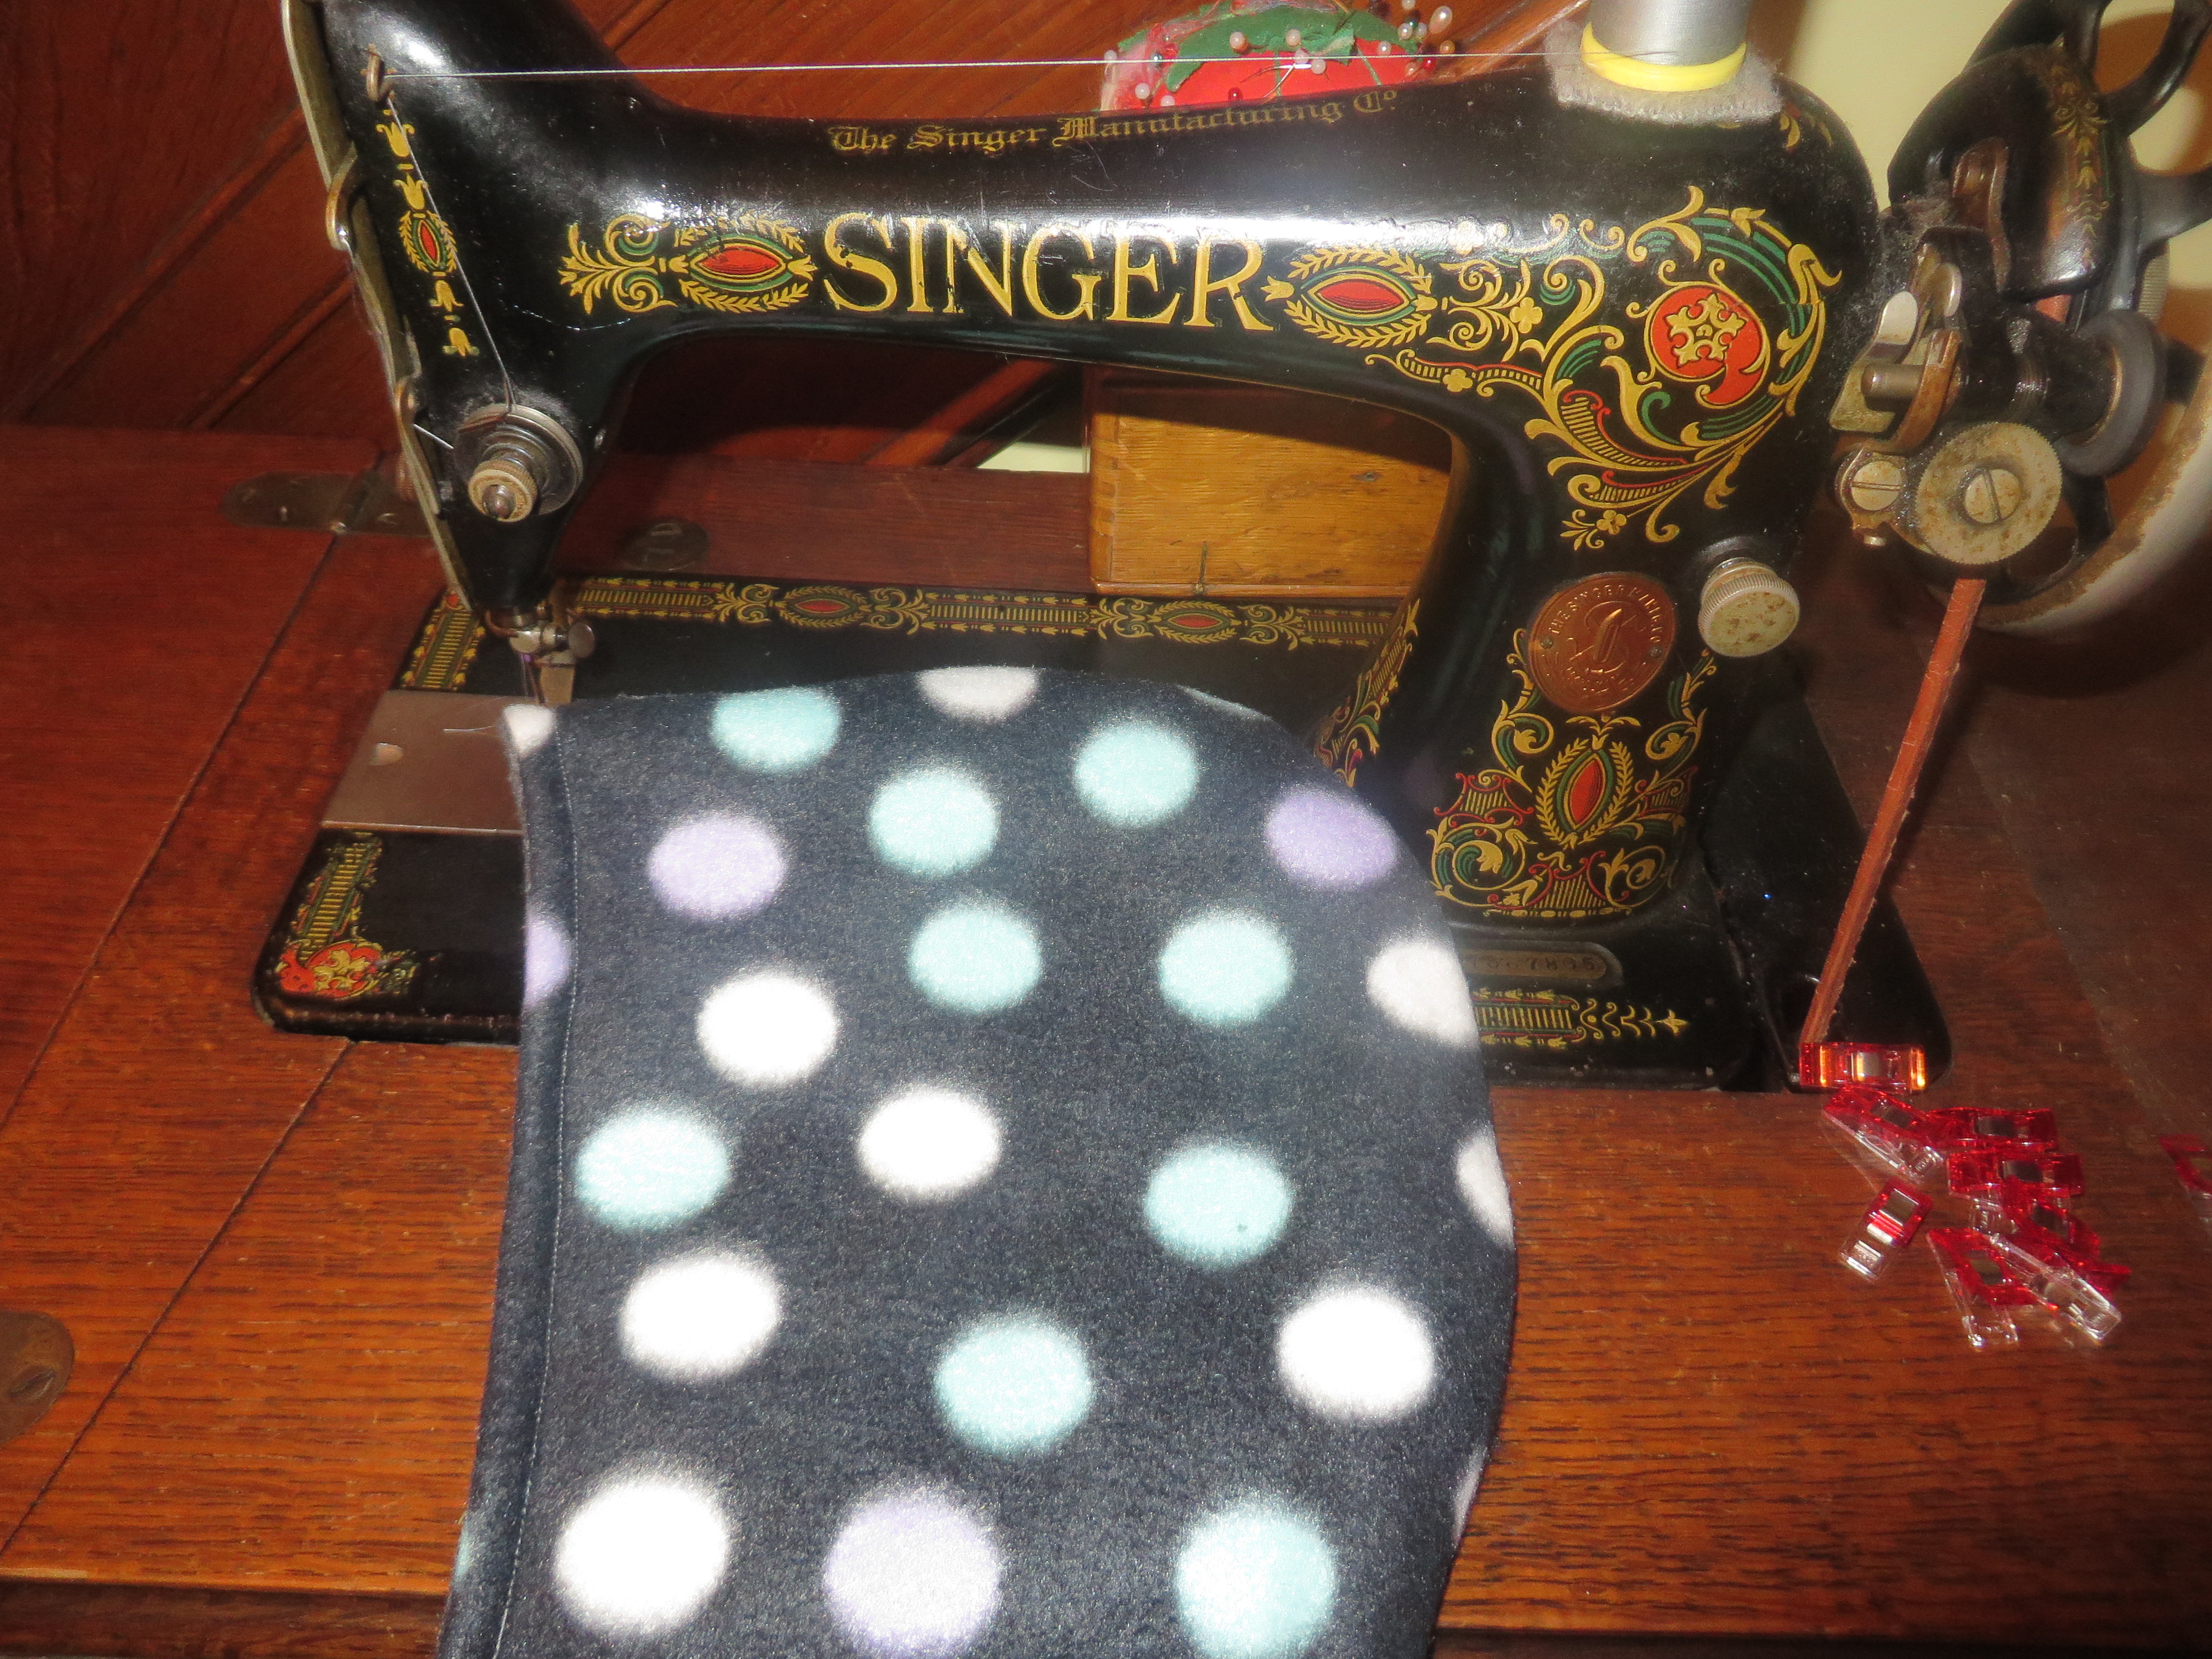
Here’s what we’re going to be making today:

This particular poncho is a different shape/design than the ones I have made in the past. I was experimenting with making the arm area shorter and the overall body of the poncho longer. This is for A.S., and she’s very tall and thin. To get the overall length she wants (like a ballgown, of course!) and for a nice circular shape, her arms are basically buried under the fabric. This was a good compromise for us as she refused to let me make any cut-outs for sleeves for her hands. Having said all that, I think I prefer the look of this one anyway:


This is the one that was gifted to a friend, and it sits so nice with this shape. It was created by eye and has two snaps (or three, I can’t remember) for the closure.
This tutorial will work for whatever shape you’re going for, so not to worry. I will give rough ideas for how I made the convertible one, and you can choose what parts of that poncho you like and use them if you wish.
Let’s get started!
Of course, first we have to get the material together.
I used:
1.5 yards each of a solid and a polka dot patterned fleece fabric (I had extra, which I like for making matching hats, scarves, mittens, etc.)
1 yard teal tulle
scissors
Since you already have the poncho folded like this, it’s easy to locate the middle where the hood will go. I like to mark this right now. In the above picture, the center is in the top left corner. I make a nick with my scissors there so that I can get a nice, centered hood. It doesn’t have to be very big, just enough to let you know it’s there. (It will also make it easier for you to make the cut for the opening on the front of your poncho.)

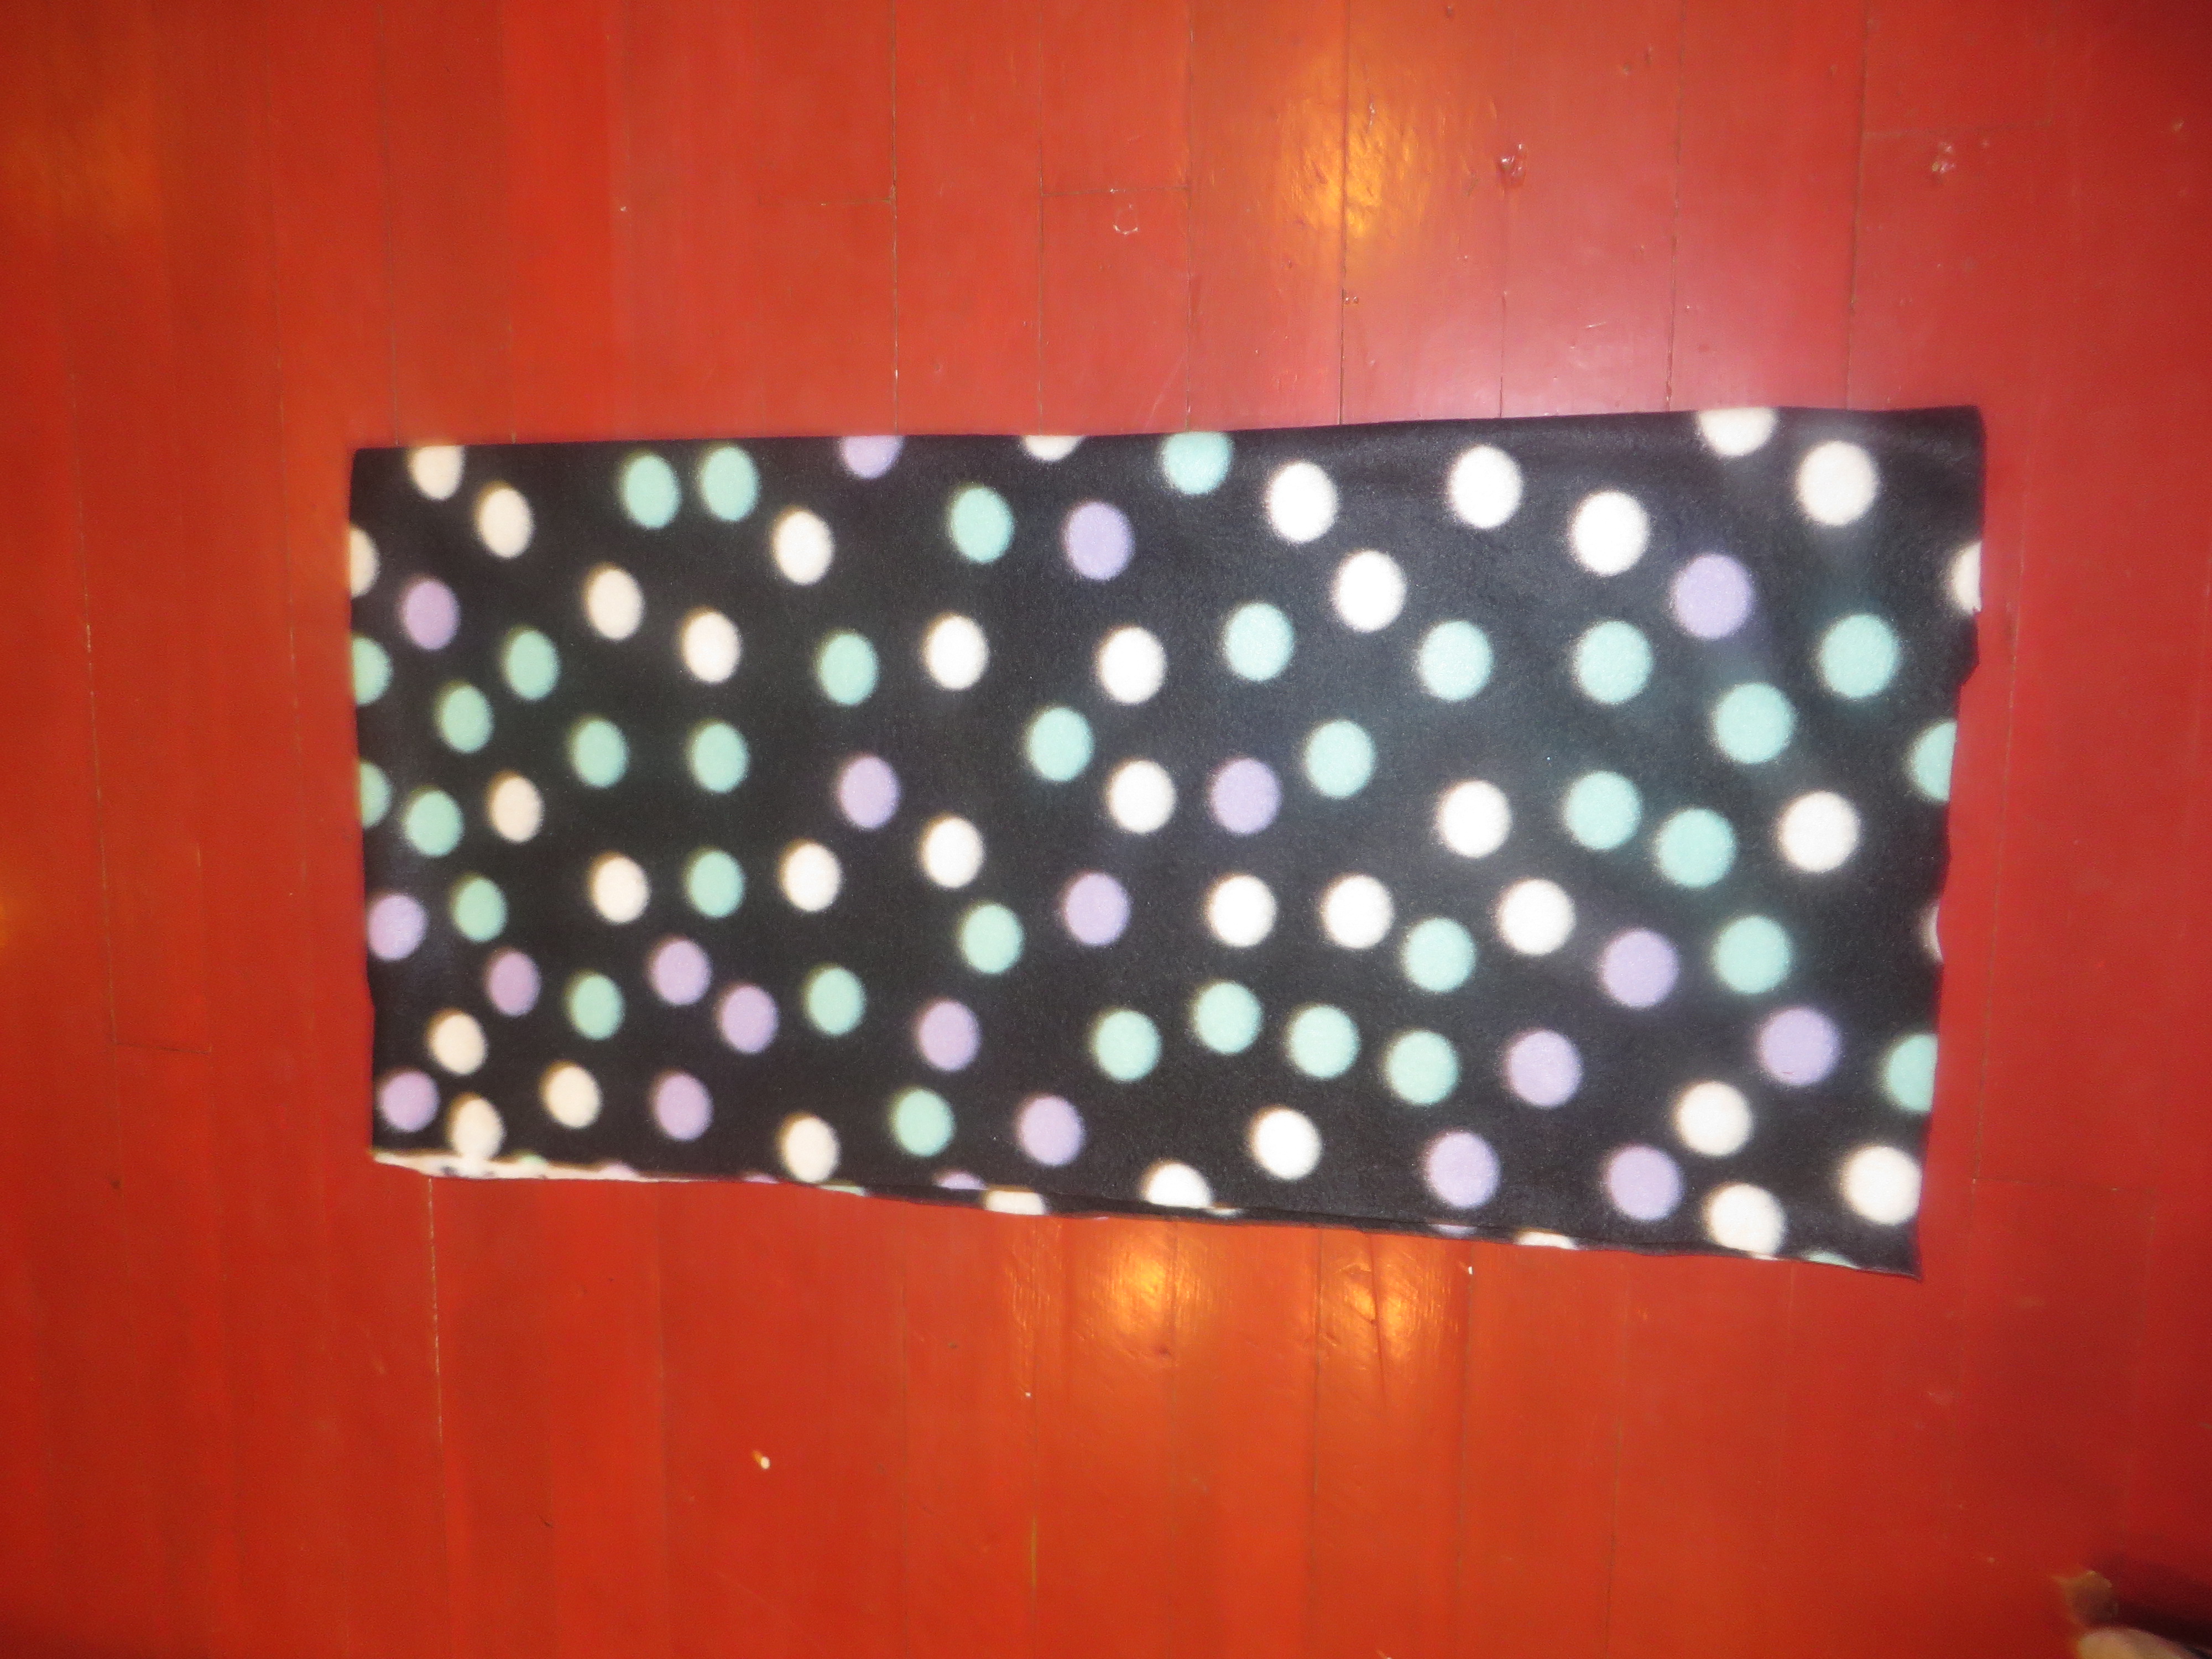
Now you have the basic shape of your poncho when you unfold it.

Now repeat this process to create this piece from your solid fabric. You guessed it! I just lay this one over my solid fabric, making sure the stretch is running horizontal, and cut. Take the shortcuts where you can get them!
Let’s set this aside and make the hood. For some reason, this seems to be my habit — to get the main piece cut and then go make the hood. Don’t ask why! I have no answers! I am really picky with hoods, so if I have a piece of clothing that has a hood that I really like, I will copy that. I like big, full hoods that do a good job of covering my ears. A.S. has this great sweater with a nice, full-bodied hood. I cheat with it often! :O)
You want to just make sure your hood is folded nice and flat, and then lay that on top of your fabric. I like to leave the fold on the back side of the hood so there’s less sewing and cutting to do, but this isn’t necessary. (If you do it this way, you will make only two cuts of fabric for a reversible hood instead of four.)
Cut out one hood piece w/ fold on back side (or two, if you are not cutting on a fold) for each of your fabrics. (*Also, make sure that you give yourself lots of extra seam allowance on the bottom of the hood so it doesn’t get to short when you attach it to the body of the poncho later.*)
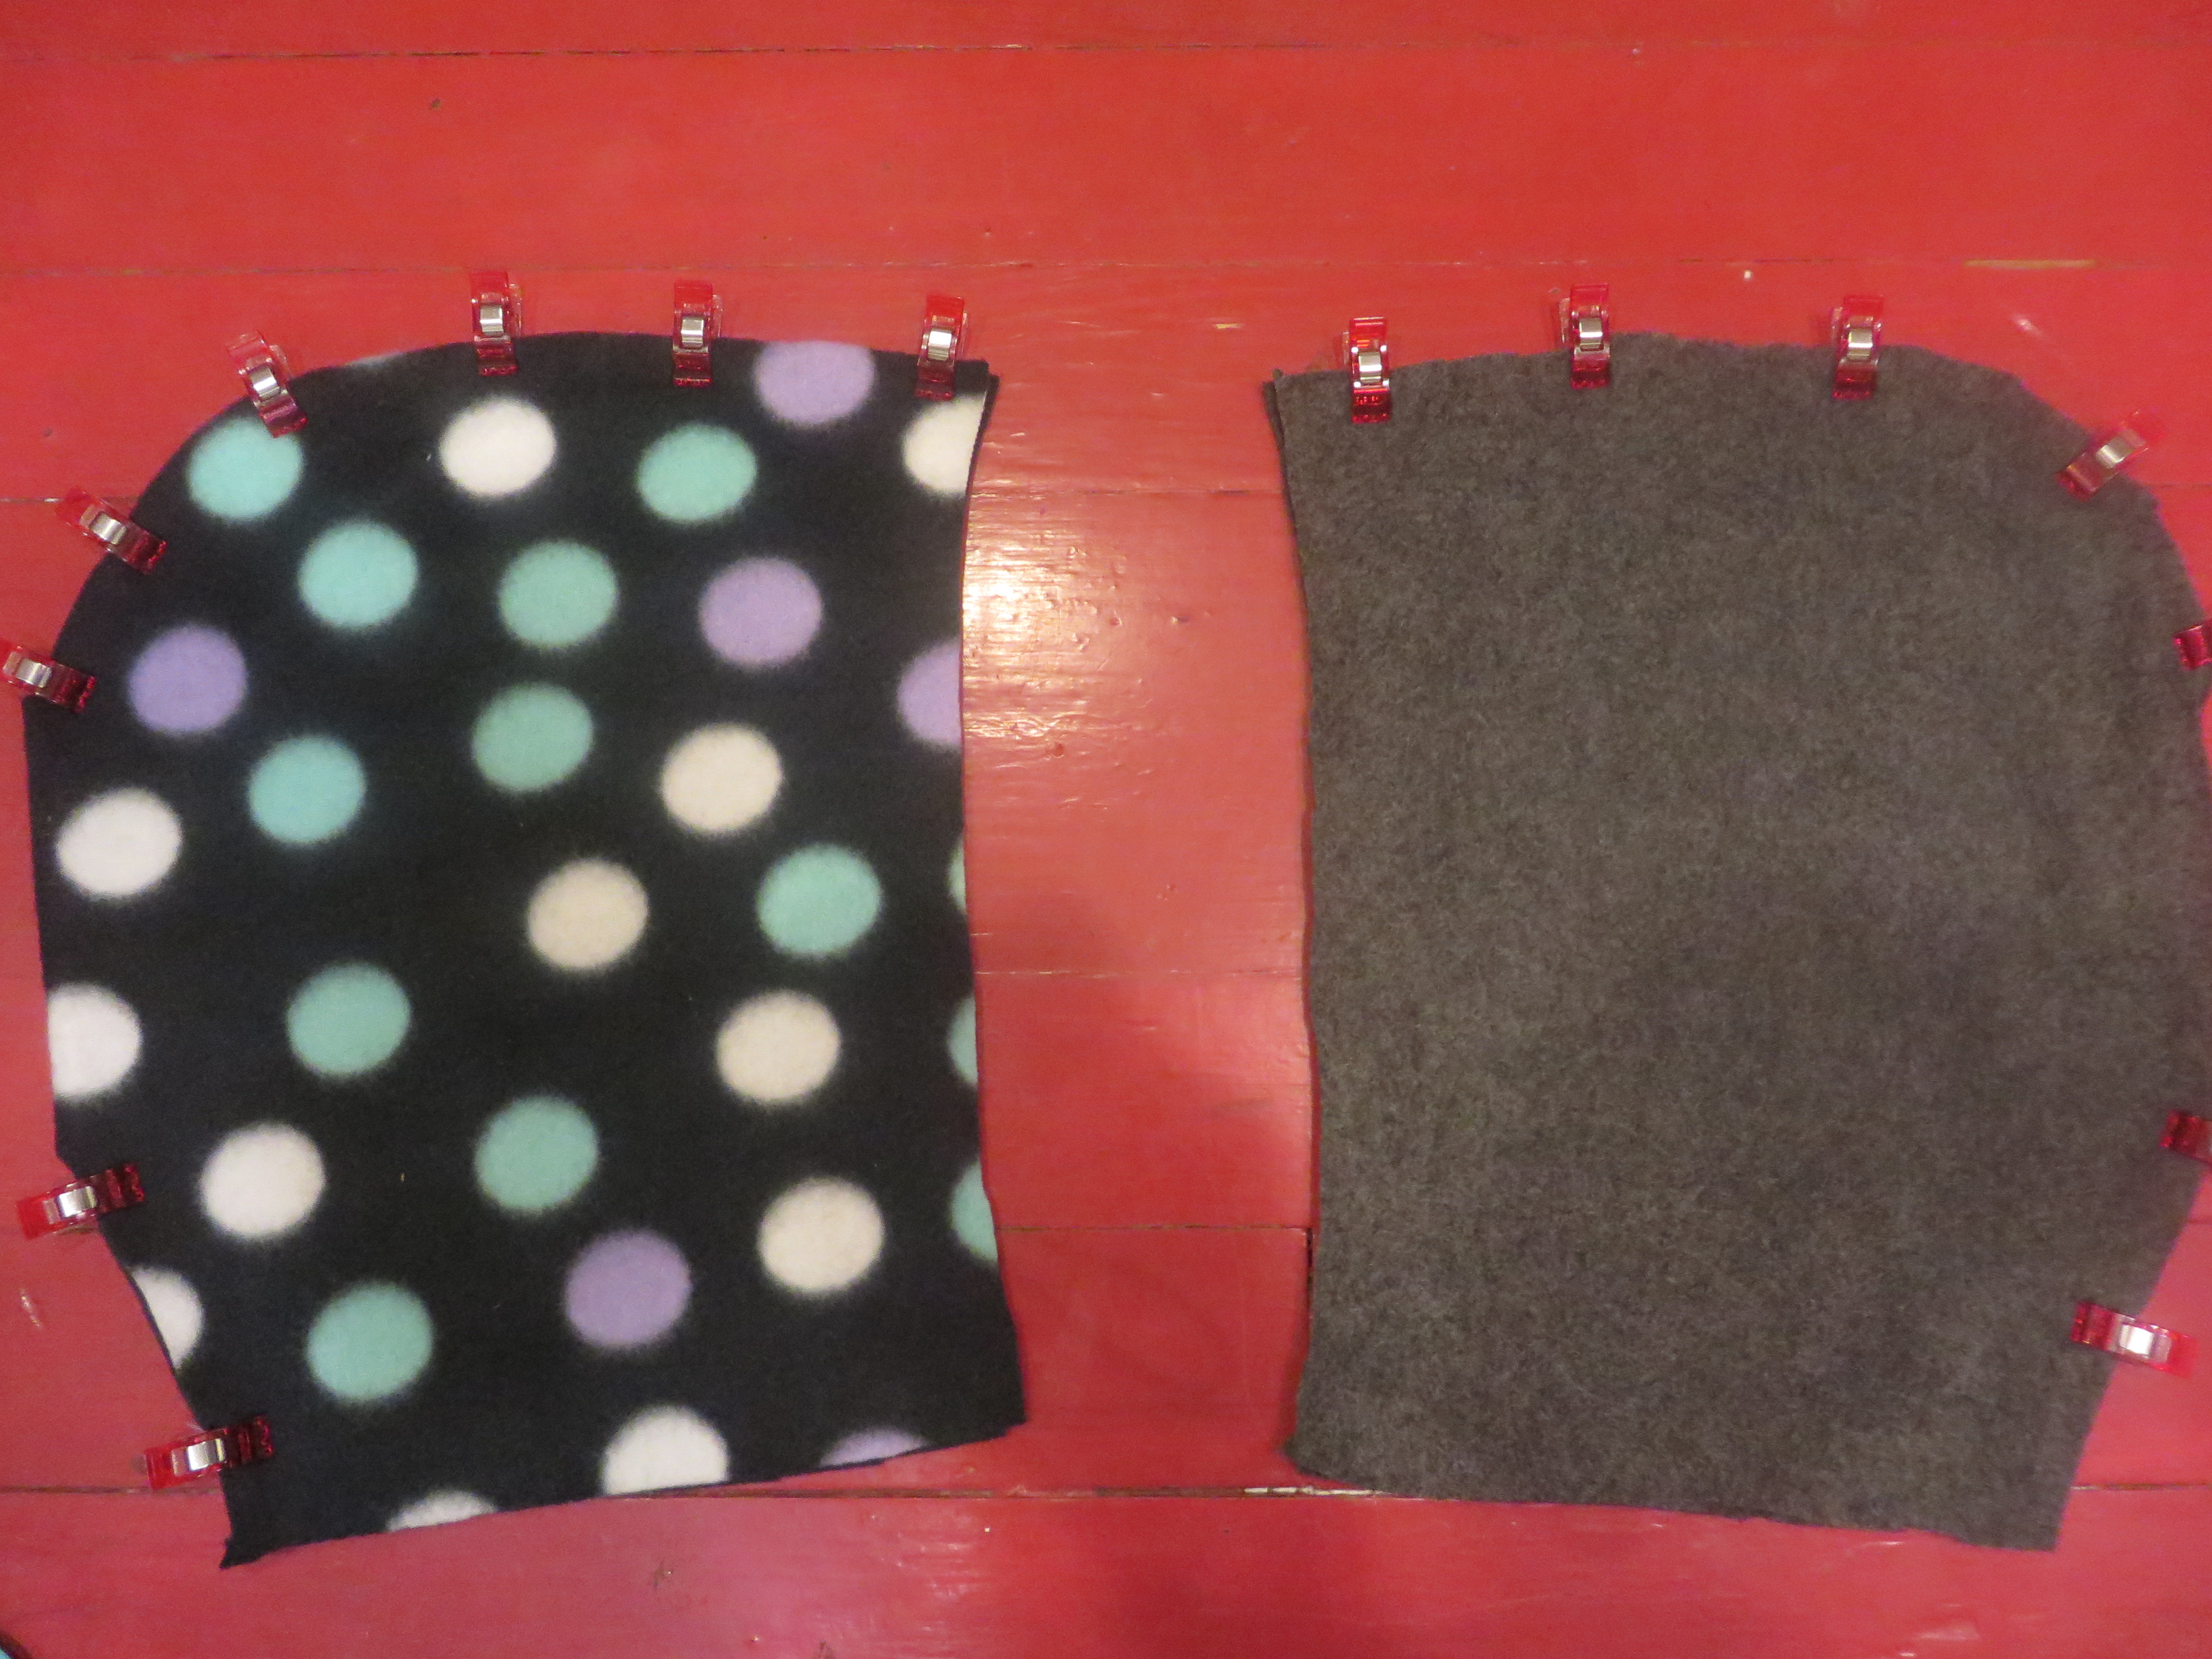
If you cut like I do, on a fold, you will end up with this:

Now take one of your hood pieces and pin or clip it right sides together, being sure to leave the front piece, which sits closest to your face when wearing, open. Also, do not sew the neck hole closed!


Sew where you have clipped, along the front of the hood.
When finished, it looks kind of funky, but you did it right if it looks like this:

Turn that right-side out and lay one hood inside the other. Pin and get ready to top-stitch.

And the hood is done!
Let’s get back to that poncho.
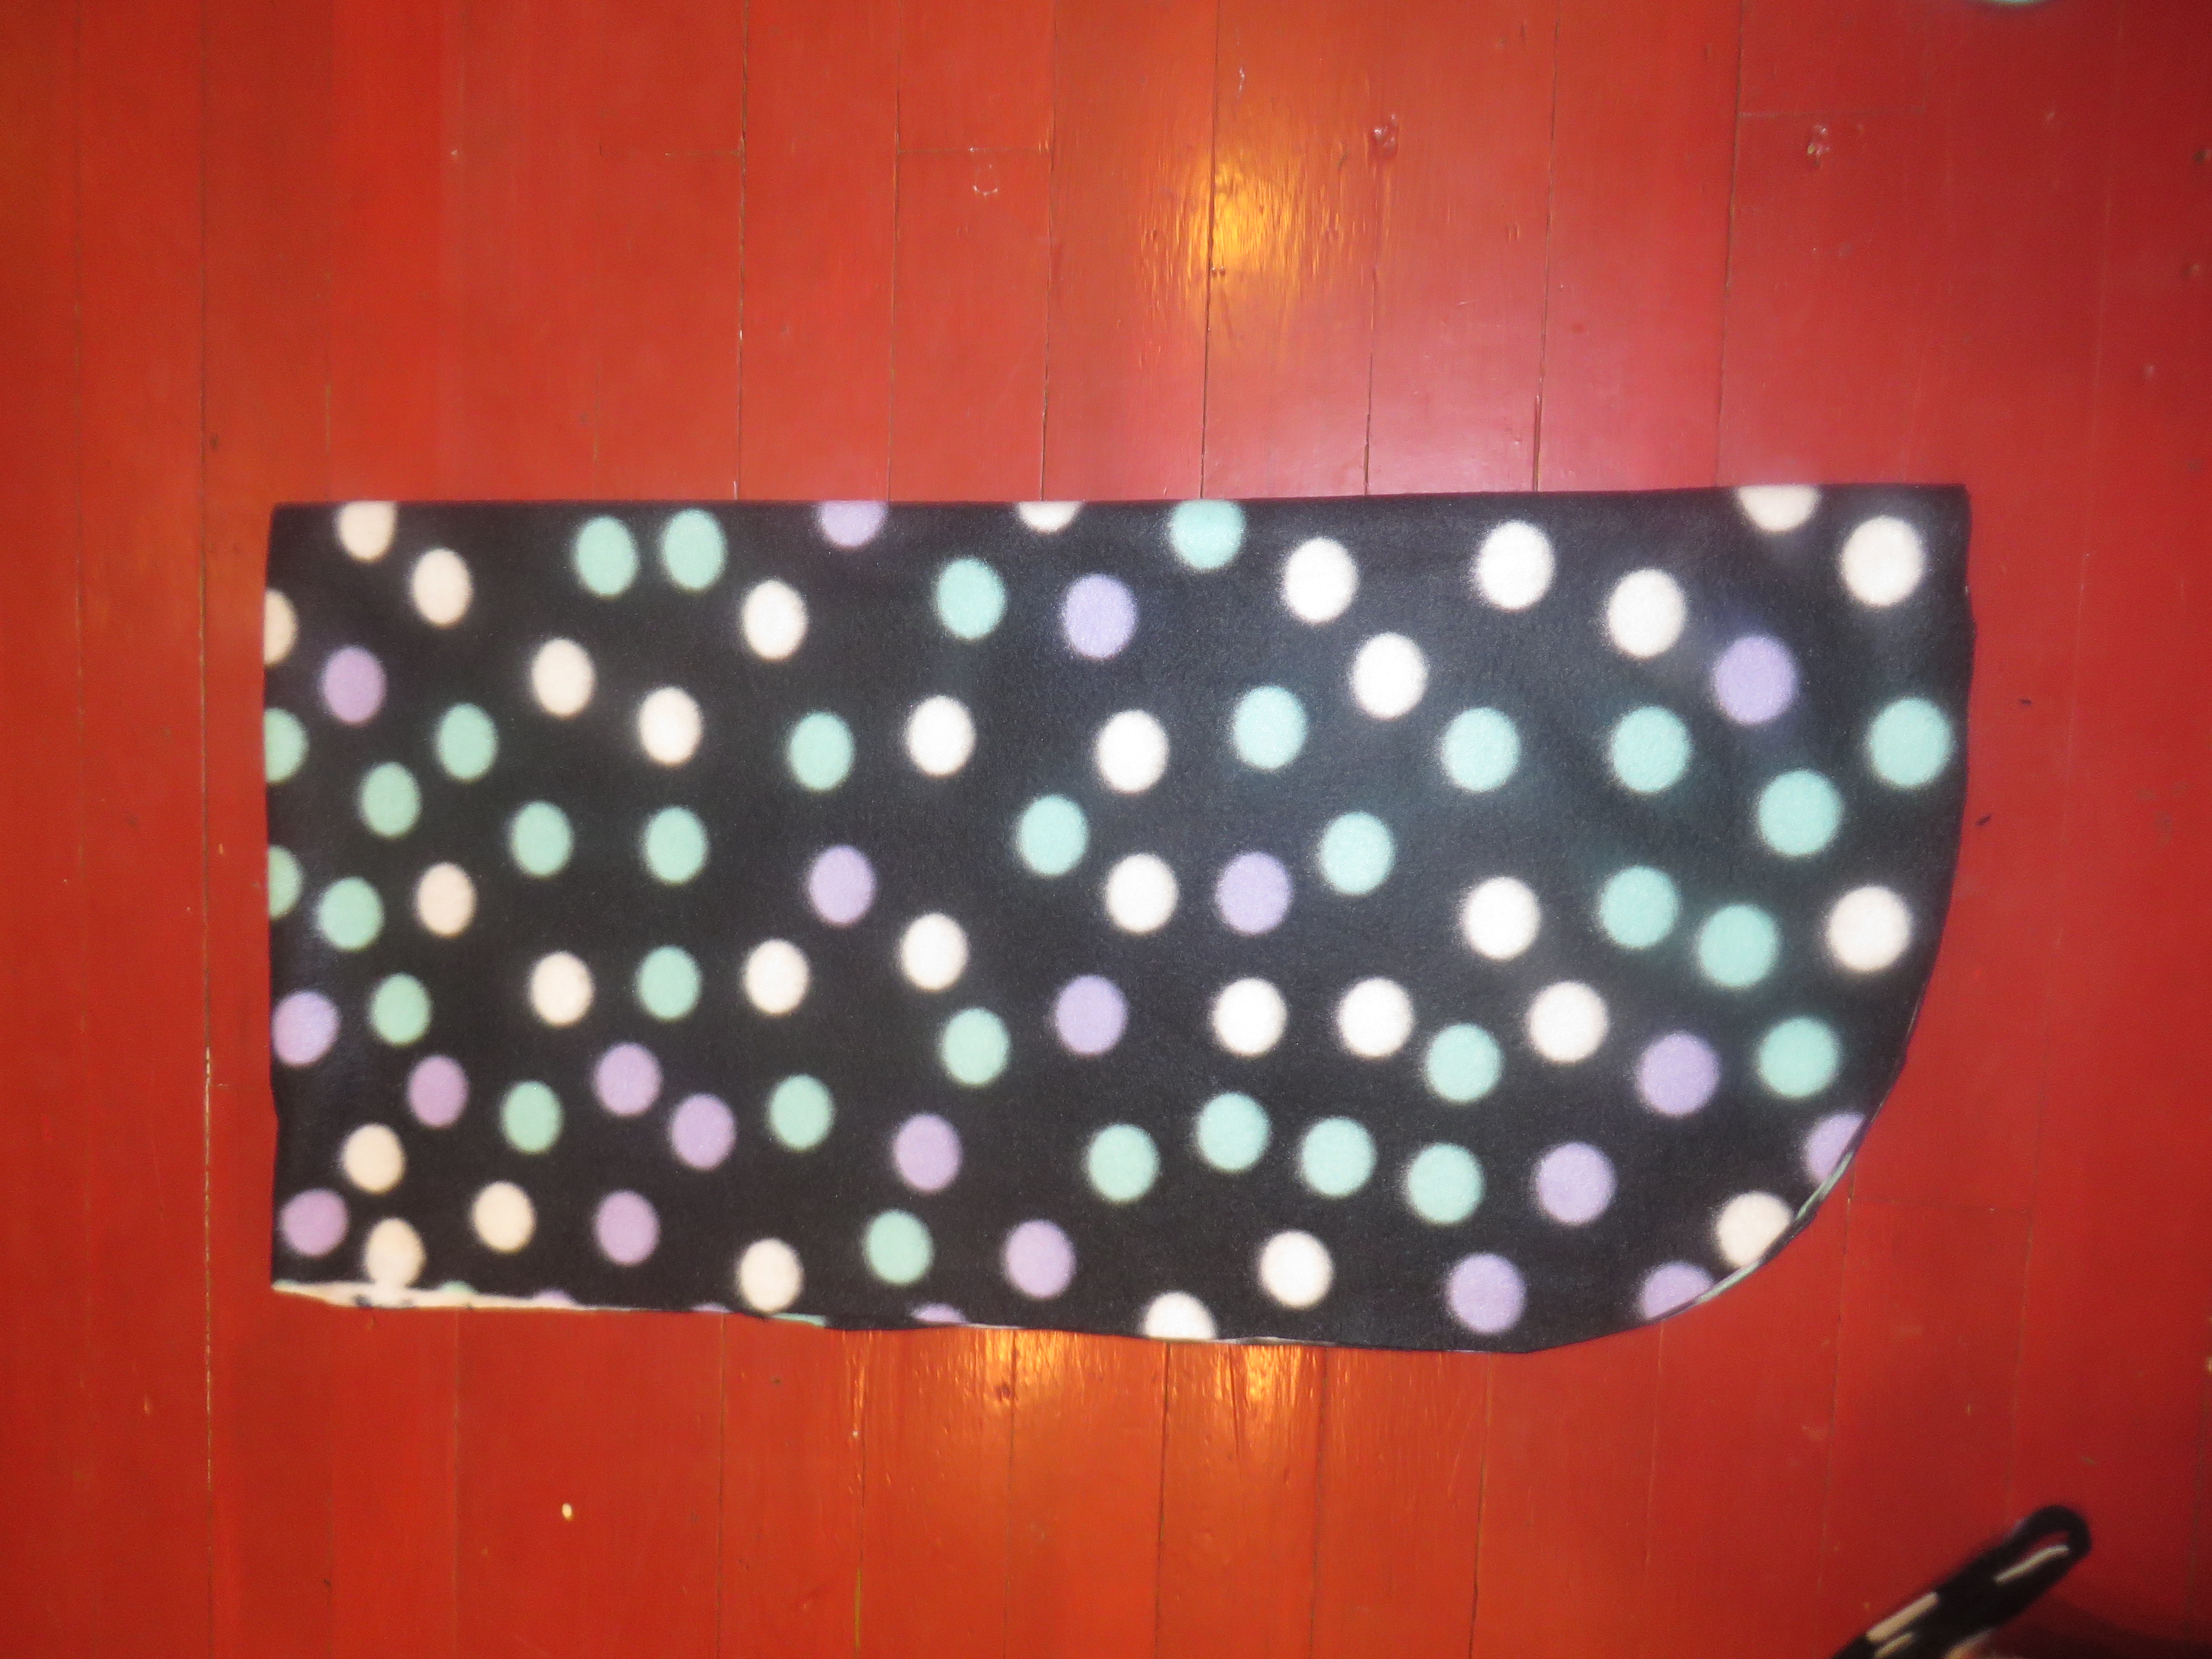
You now have two pieces of fabric, one solid, one printed, cut into the same shape for your poncho. Next, you can cut up from the middle of your front piece of the poncho to meet the little nick you made to mark your hood placement.
Sorry in advance for sideways photo.

Repeat this step for solid fleece.
Lay them on top of one another, right sides together, and make sure they are as close to same shape as possible. Looks like this.
 Now get that yard of tulle of yours.

Now we are ready to cut our tulle strips. I’m so math-savvy that I use my floor to decide measurements and maintain semi-straight lines! Of course, all the lines are crooked in my 100-year-old house! I won’t hold it against you if you want to use a ruler here! So I basically cut my tulle strips to the height of my floor slats. Let’s say three inches. I just cut the whole yard of tulle I had (and used all of it) into these three-ish inch pieces.
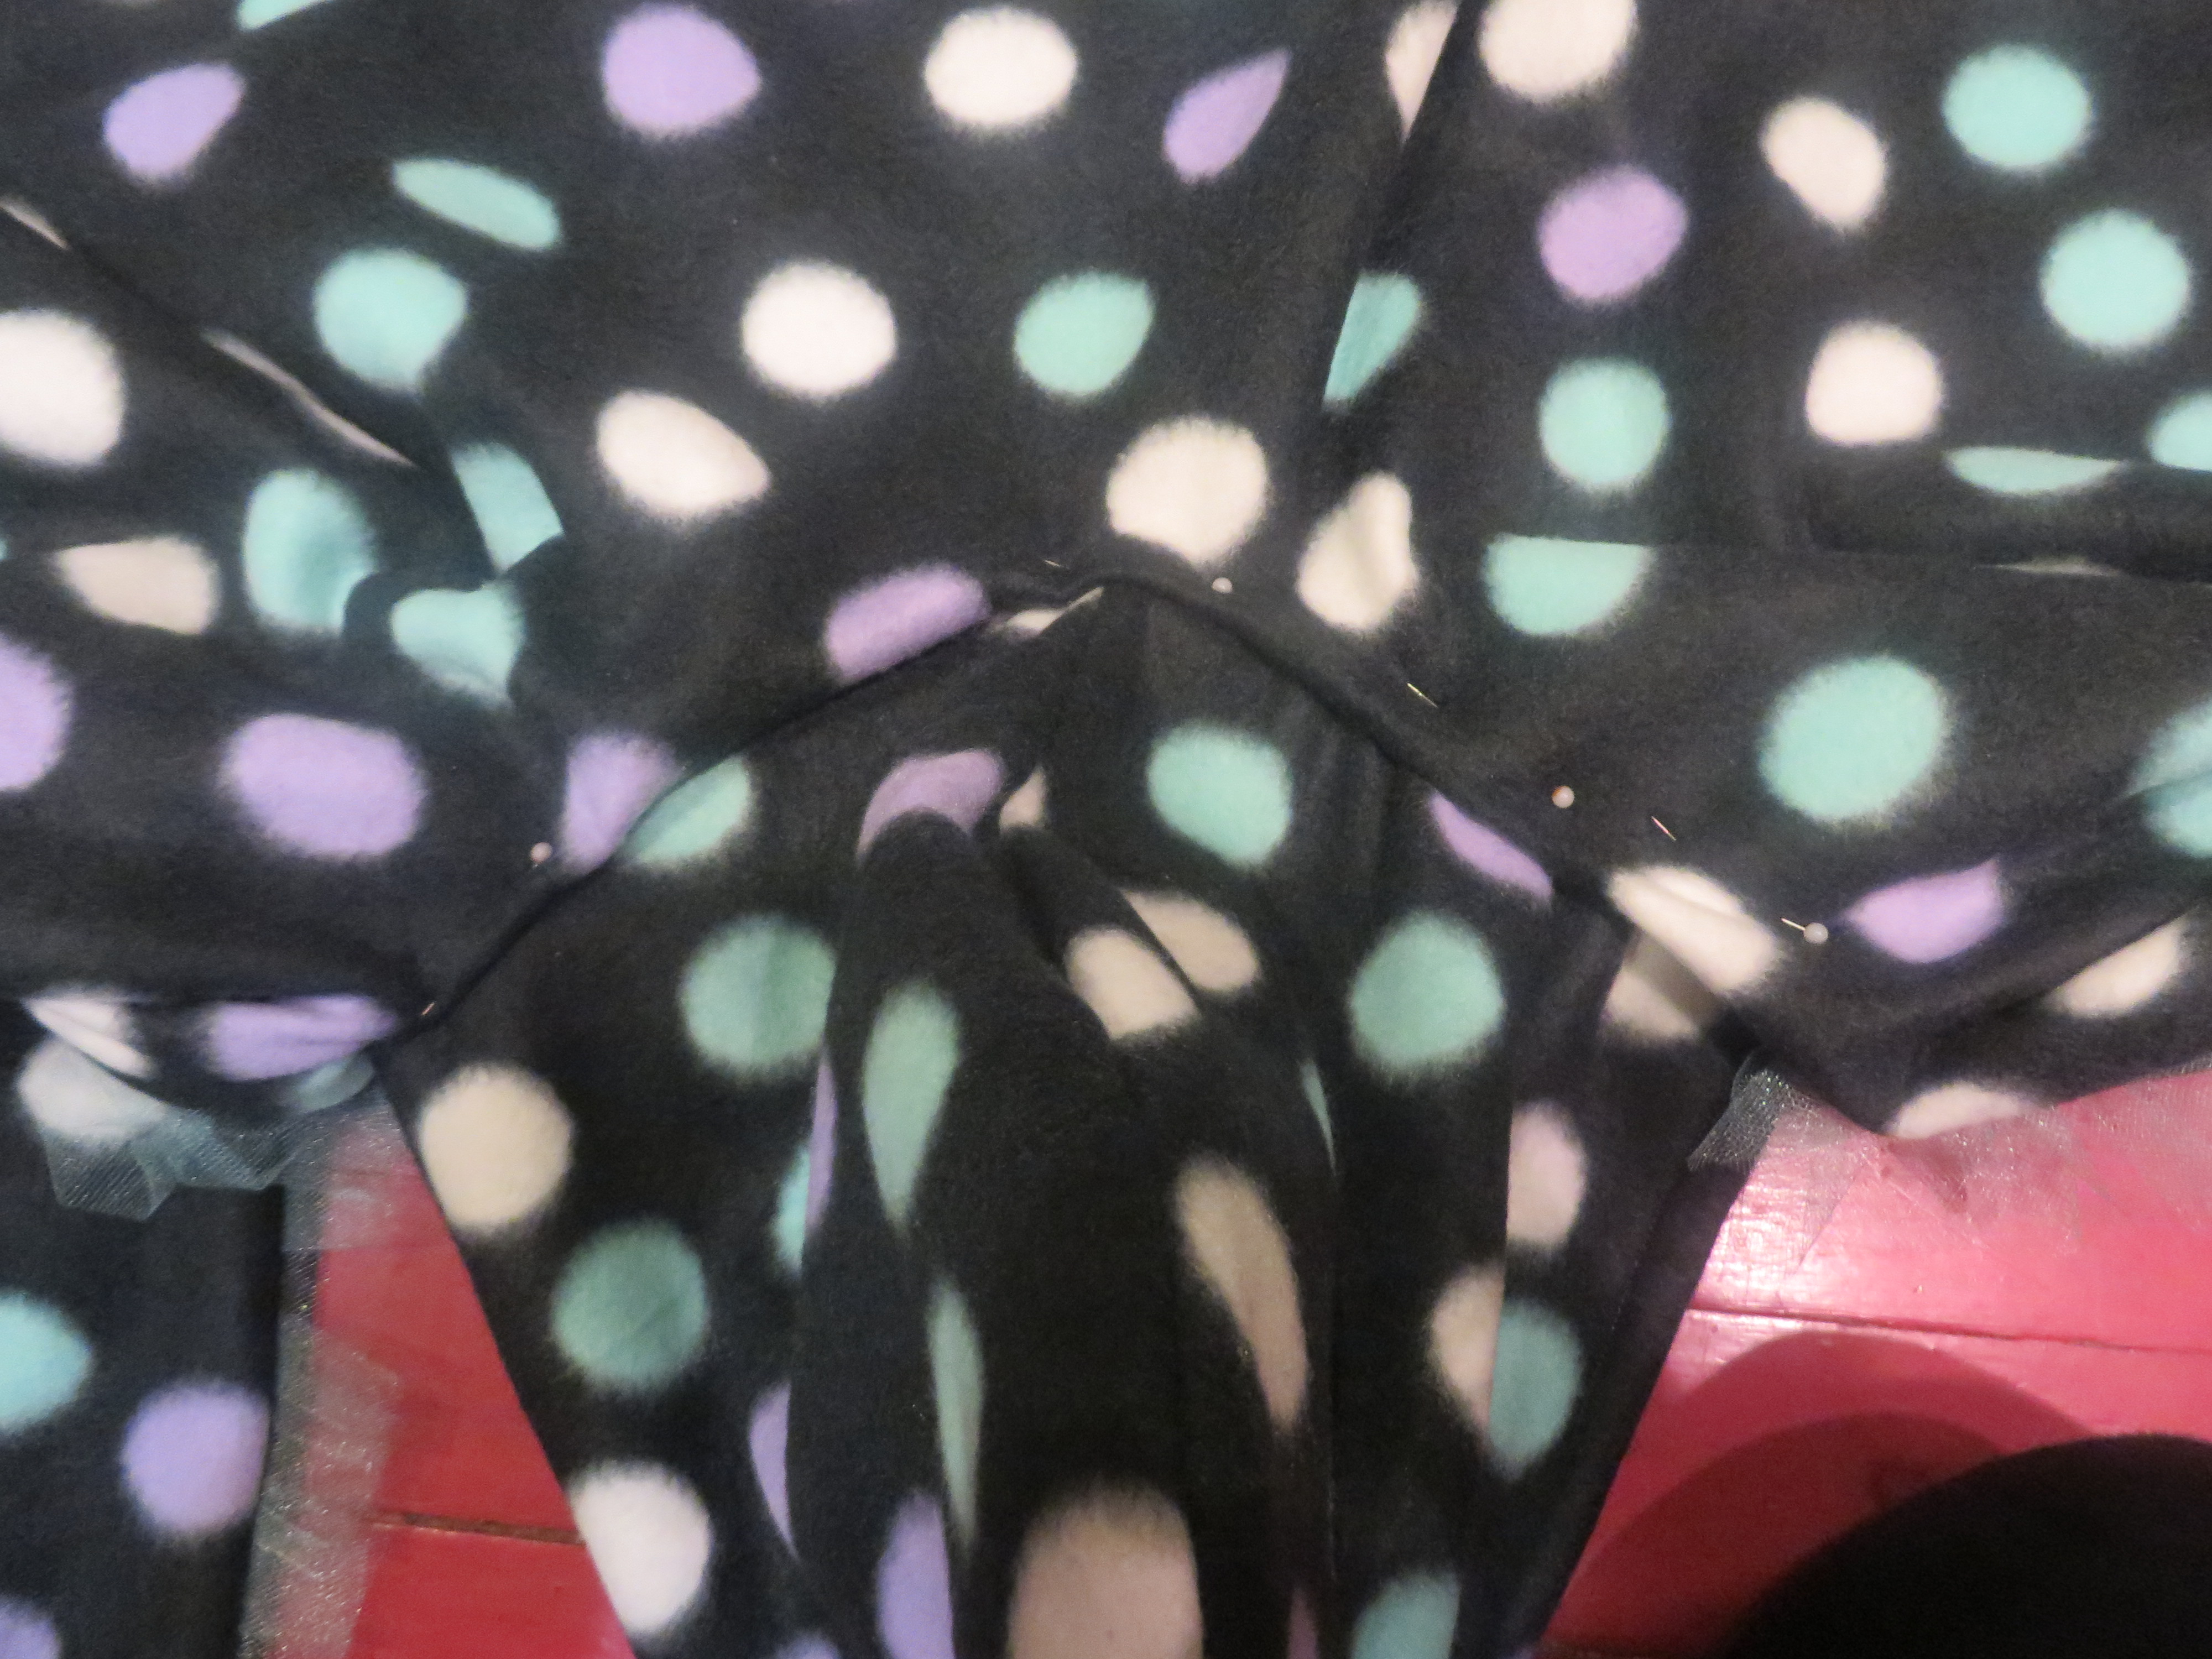
And here comes the tedious part that makes all the difference in your finished product! You want to stuff your tulle in between the two layers of your fleece, making sure the end of the tulle is flush with your fleece. Let’s get a picture of this before it gets confusing.

When stuffing your tulle in between your layers of fleece, you also want to generously bunch or scrunch your tulle to get the right look. Pin or clip super often! Tulle can be slippery and challenging! Keep scrunching and pinning and clipping all the way around until you make it to your neck hole!
 And keep on pinning and clipping and scrunching and bunching! It will be worth it, I promise!
Once you get it all pinned, sew as close to your edge as possible. Turn right-side out. Looking good!

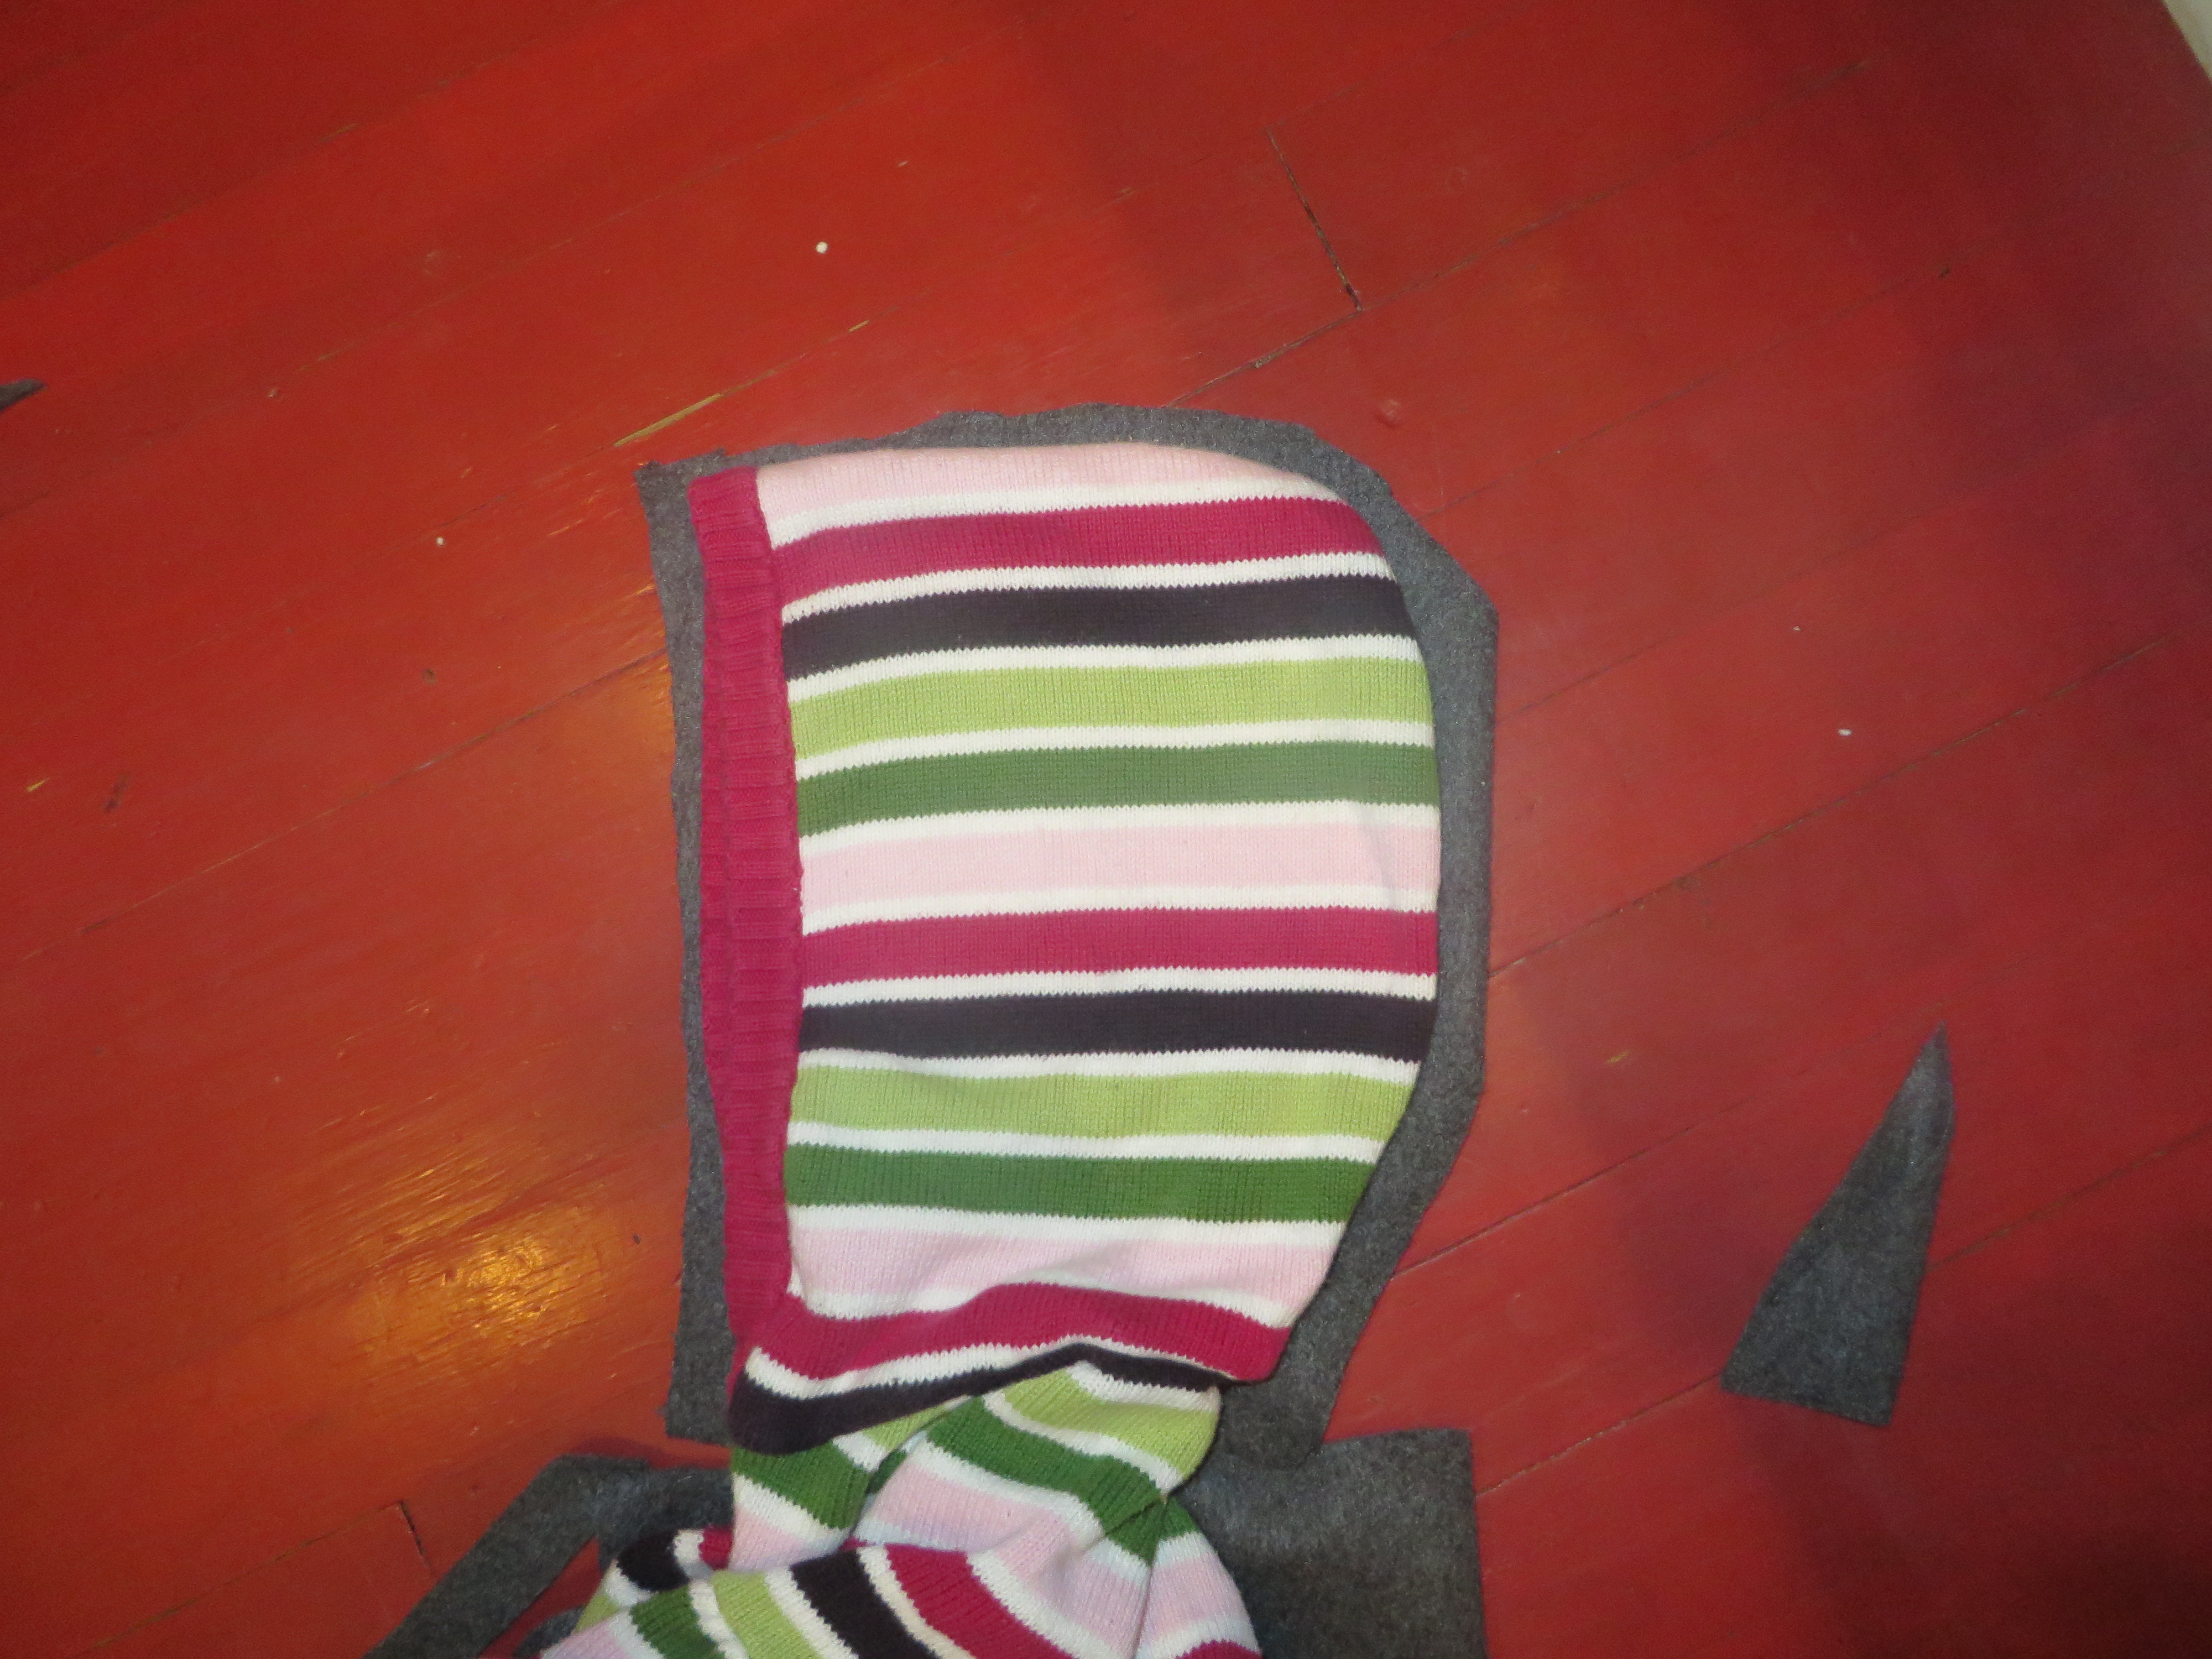
And now it’s time for that pesky hood. This is the trickiest part of making this, I would say! We need to lengthen the line of our opening to accommodate our hood. I like to make a kind of half- or three-quarter circle line. I just manipulate the hood into a circle and cut a circle that’s pretty close.

Now we need to stuff the hood inside that hole and make it look good. Difficult, but not impossible! Starting at one end of hood, tuck it into the body of the poncho, making sure that the fleece on the body of the poncho is rolled in so that you have a nice, finished look at the base of the hood. Watch that inside fleece fabric! It likes to roll out if you don’t pin exactly right.
Now sew this closed.

Now you can go back and pin and top-stitch the body of the poncho, securing the tulle in place even more and giving an overall more professional look.

And now for the snaps! Surprise, surprise – I just do the closures by eye. I like three-inch spacing between snaps. I go right down the center.
Using your awl that comes with your snap pliers, pierce a hole in your fabric where you’d like your snap to go.

Your snap socket will go on top, and your male socket will go on the other side of the fabric. You will use the opposite set up for the other side of your closure. So for one working snap, you will use two sockets and one male and one female:

Continue this down the front center as you like. On some ponchos, I do one or two. For this one, I think I did six total as it’s what I call a “convertible.” We’ll get to that in a second.
You are done! Well, you might be?! Remember I just mentioned the “convertible” aspect to this particular poncho? Well, I was experimenting with a way to keep these short sleeves as sleeves. A.S. vehemently argued against this. And then I came up with a compromise. Actually, it’s the perfect compromise, I think. I decided to make snaps to form the shape of a sleeve and hold this poncho in place more like a light jacket. Let me show you a picture so it makes better sense.
Boy, it’s really busy with those polka dots and difficult to see! If you look really closely, you can see two snaps on either side of the poncho that make kimono-style sleeves. I had A.S. try it on and then just marked where I thought they should go on one side. Then I folded the poncho in half to get it as close to symmetrical as possible on the other side. We use these all the time!
You can leave the kimono-style sleeve snaps snapped and then it’s just a pull on jacket. Or you can just not use them and use one or two of the snaps on the front closure so it’s a cape. Versatile product, isn’t it?!
And now you’re really, really done. How did it turn out? I’d love to see a picture of it in the comments below! I’m always looking for fabric combo suggestions/ideas, and I have many more potential recipients of this cool cape!
Thanks for crafting with me! And if you were waiting for this, I’m sorry I took so long to get it up and running! :O)
C
